
There is one little thing that can absolutely destroy your perfect, well-planned backcountry landscape photography trip, and it is called a bear. Do you give much thought to bear safety when you are on a landscape photography trip in the mountains? If not, I’ll show you the steps that I take in order to avoid confrontations with bears and some other great nuggets of safety information as well.
What do I need to pack?
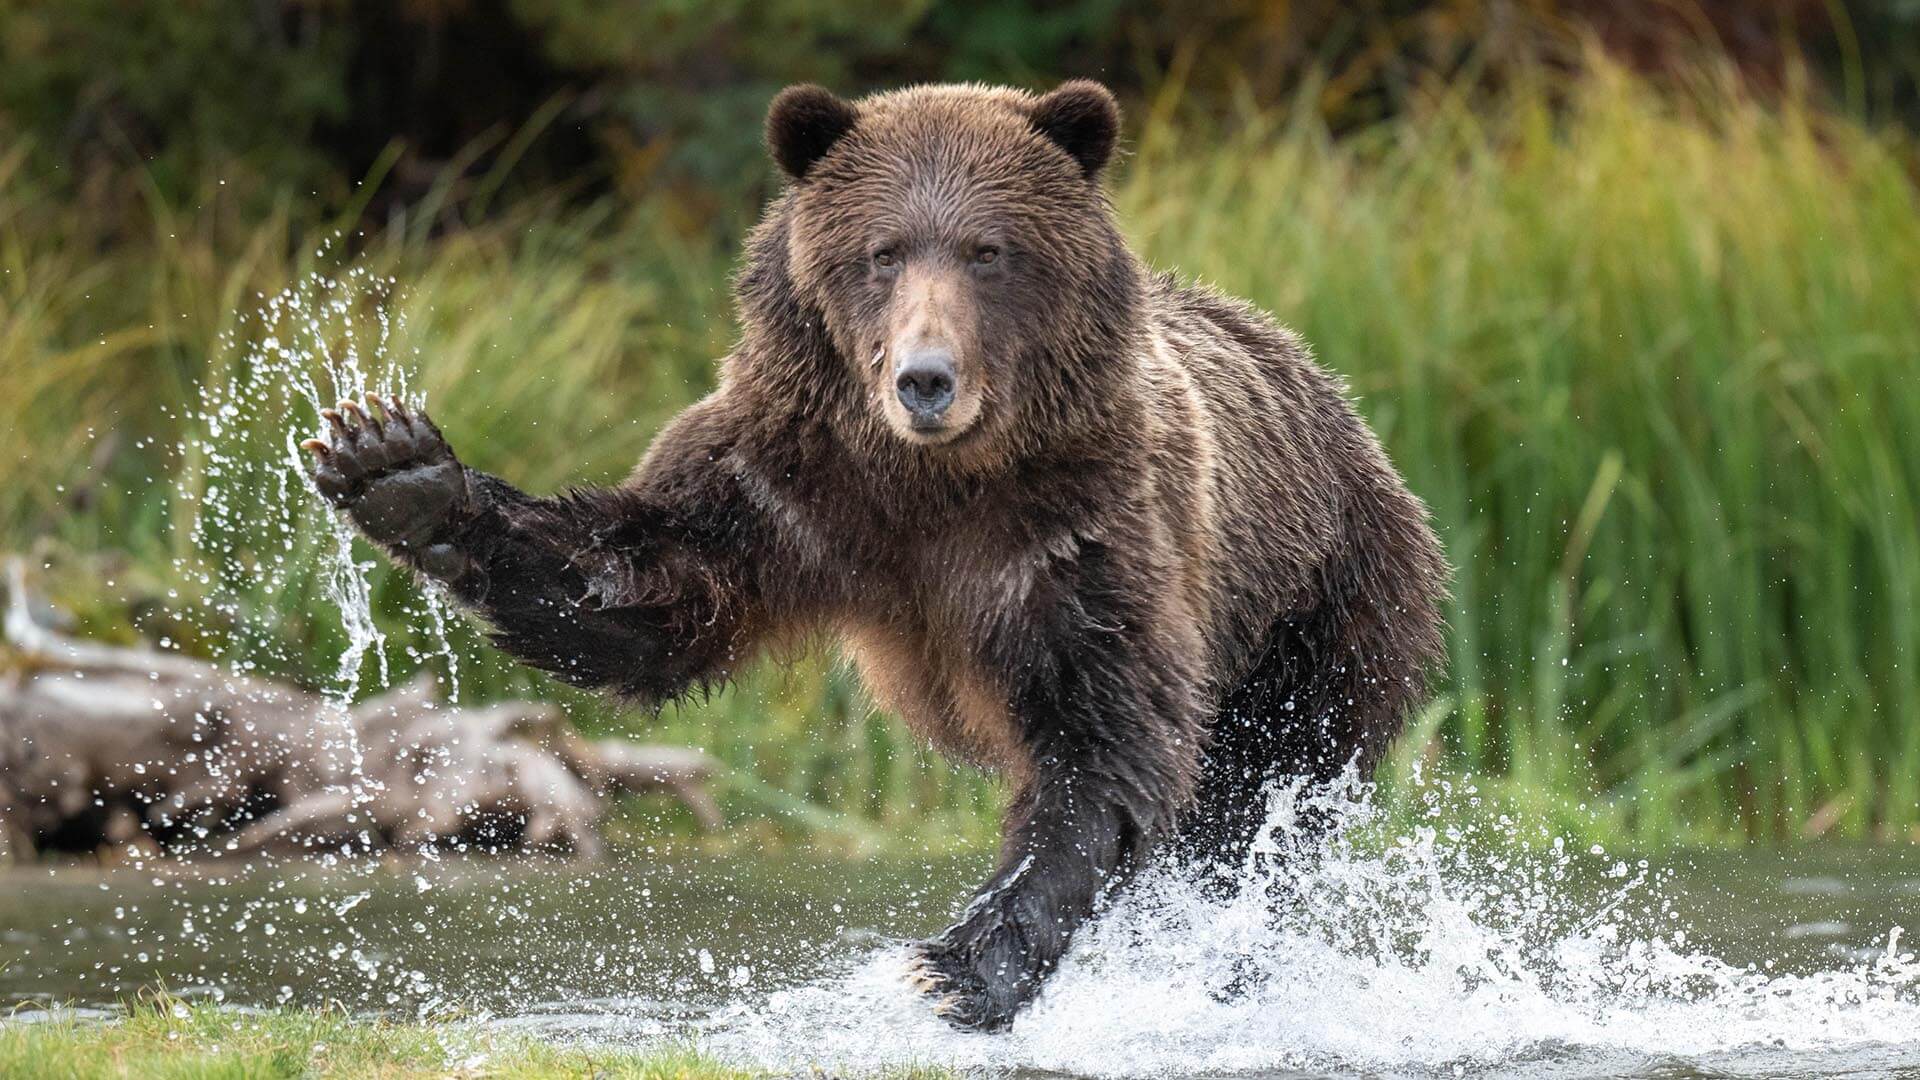
The first, obvious device that you’ll need to have on a backcountry trip is a headlamp. You’ll need this for sure get back to camp after sunset, but we are in bear country. And I don’t just mean like black bears — this is grizzly bear country. On average, these bears weight between 400 and 460 pounds, so they’re not something you want to mess with. So you have to have bear spray with you.
My partner, Leah and I both have our own cans of bear spray that are really accessible, so if you need it, you won’t have to dig through your pack to get it. I actually have a little stretchy pocket on the side of my pants that this can of bear spray fits into perfectly.
Bear Bangers and bells in the backcountry
And the other thing that I have, this is called a bear banger. It’s a little, pocket-sized device with a firing pin that hits the back and it shoots a projectile about 50 meters. The projectile then makes a very loud banging noise that can theoretically scare away a bear giving you serious grief. But that’s kind of a last resort thing.
And it’s not something that you want to use unless you’re in a somewhat life-threatening situation. Make sure if you do have to use one of these, that you point it straight in the air, instead of shooting it at the bear. This is one of the biggest mistakes people make when using bear bangers. because if it explodes behind the bear, all 450 lbs are going to be running at you full tilt.
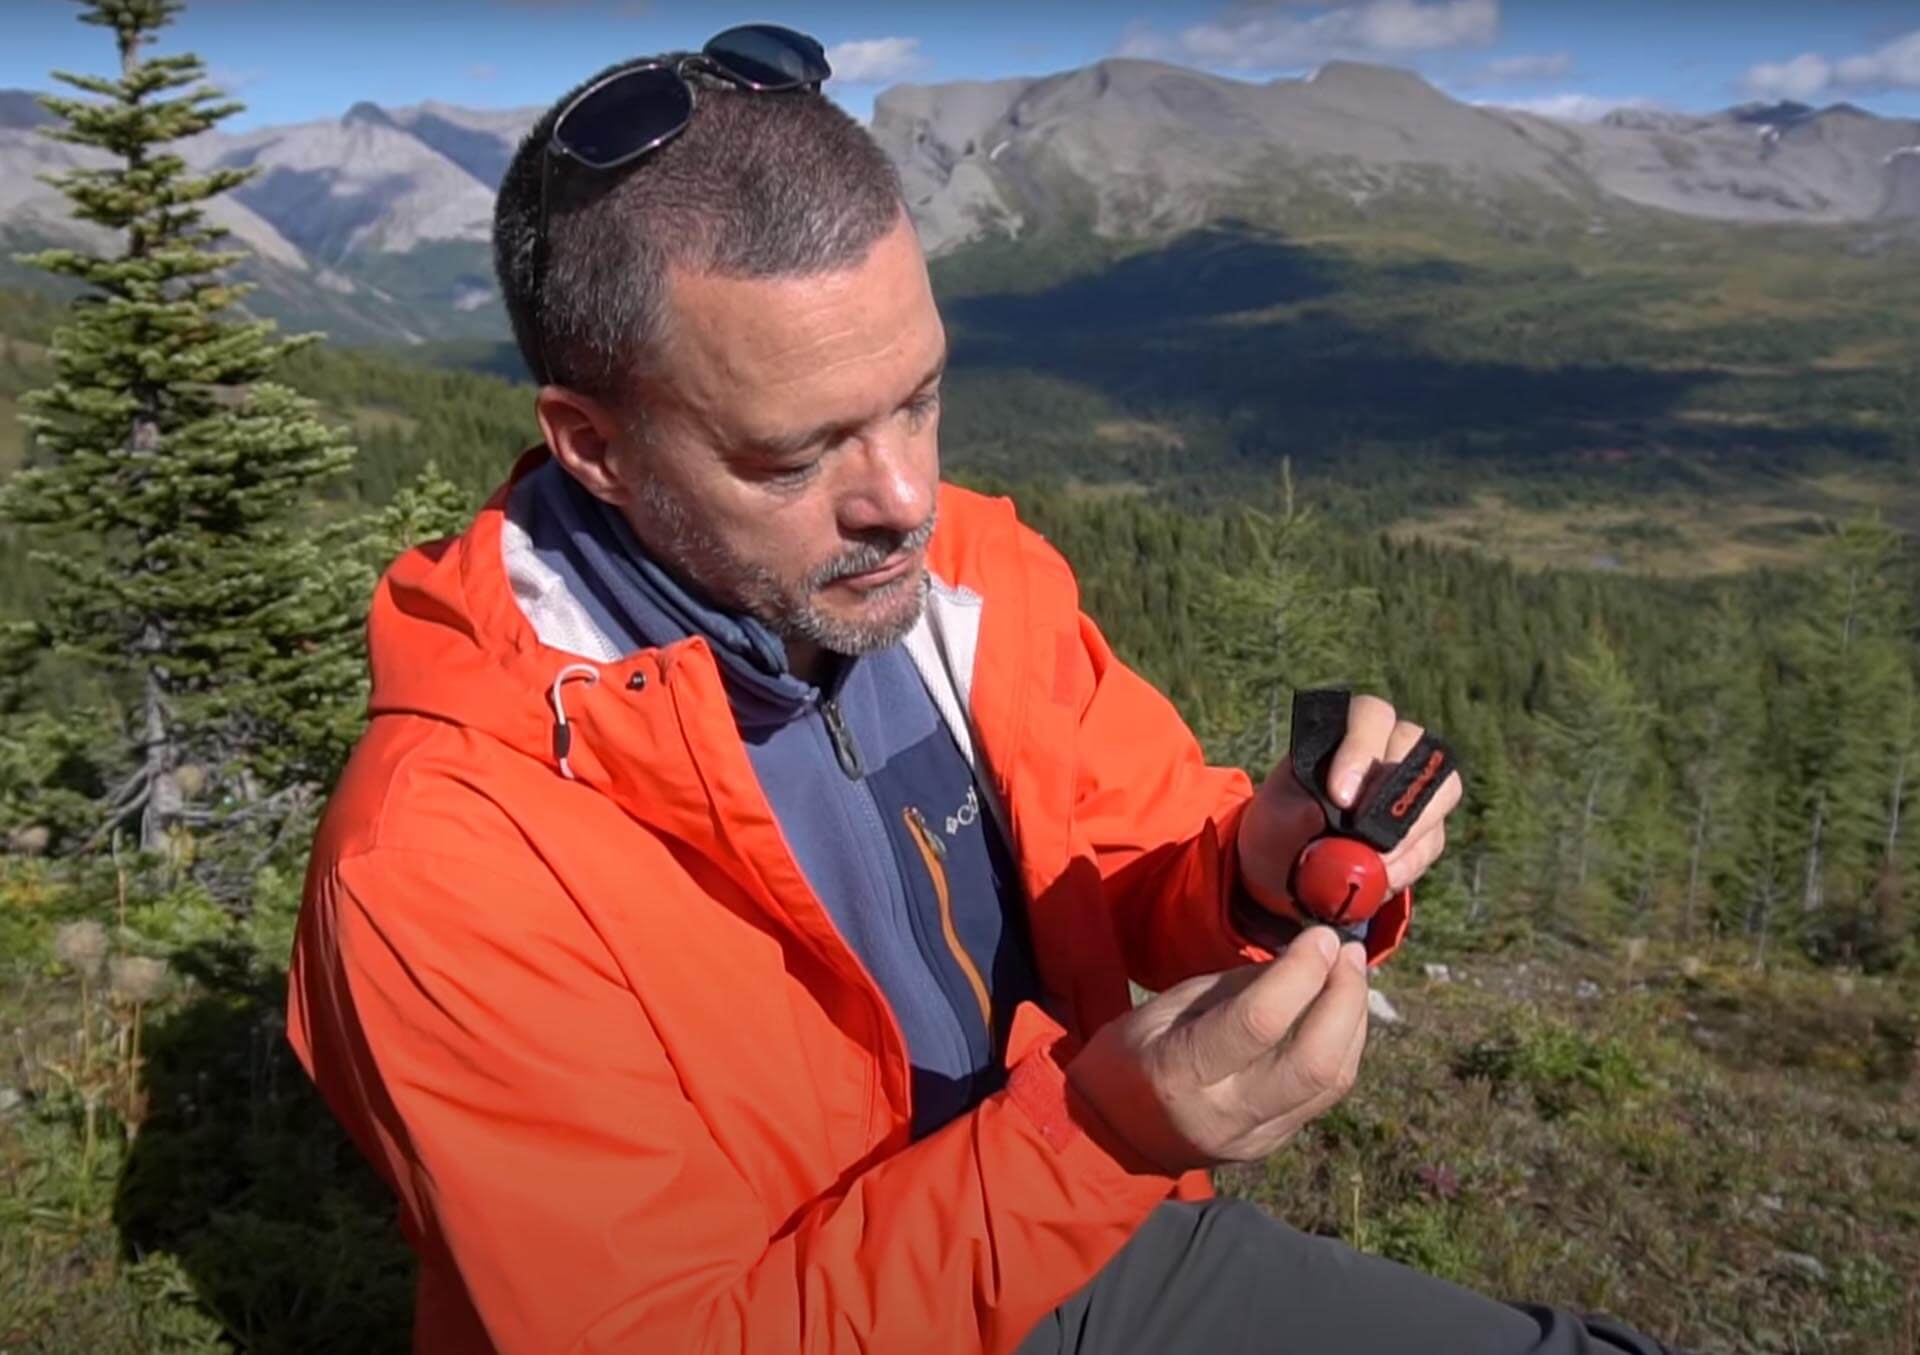
Bear bells: the cheapest, easiest solution for avoiding confrontation
When you are hiking in real bear country, it’s not a bad idea to have a bear bell. This one here is kind of cool because it has a little magnet built into this strap right here. And if you put the magnet right at the bottom, it holds the little ball so that it won’t ring. It’s just a great idea to let any potential grizzly bear mamas with cubs know that you’re coming so that you don’t surprise them. Usually, the best way to let them know you’re around is to talk with your friend or partner. But if you’re walking difficult terrain for more than 10 hours, there’s going to be some silence. So bear bells are an excellent device to make sure you don’t come around a corner and spook them.
I have been hiking in the backcountry for my entire adult life. I’ve never had a negative confrontation with a bear. I’ve seen lots and lots of bears. And in every single case, they have all run away. They are not looking for confrontations with humans, but when you surprise them — especially a mother with cubs — that that’s when you can run into trouble.
Non-photography related essentials for backcountry photography
The other thing I need to have on my backpacking trips is a little first aid kit. When you’re way out there in the backcountry, you never know when you’re going to need first aid. So it’s just better to be prepared. Make sure to have the essentials, bandaids, gauze, scissors, tensor bandages, and some antibacterial salve. Another really handy thing to have on a backpacking trip is a lock blade knife that can be opened with one hand. Obviously, you’re not going to use it for photography per se, but when you’re way out in the bush, it’s something that you’ll use every day.
And then that brings me to water. So when you’re hiking really long distances, you need a lot of water with you. But the downside of that is that water is just so heavy. So the workaround is to carry a bottle that has built-in filtration. This way you can just grab water out of any stream or lake along the way. The one that I’m using is made by LifeStraw.
So those are the basic essentials. Obviously the other thing is rain gear like today it was sunny and then it was cloudy. So you have to have full rain gear, pants, and jacket, then be prepared for the cold. I brought along my wool cap, or toque as they call it up north. And even though it’s nice and warm right now, it gets cold in the backcountry. These are the mountains, so the weather is so unpredictable.
How can I save weight?
Another thing about these hiking types of landscape, photography, trips, weight is everything. So I look for gear that weighs the least amount, starting with my tripod. I make sure that the tripod that I use for landscape photography is carbon fiber since it’s lighter than aluminum. The tripod head that I use is also as lightweight as possible It’s really important because every gram, every ounce really adds up when you’ve got it on your back in a backpack and you have a long, long way to hike.
Another thing that I want in my tripod is a hook right beneath the tripod head. And I want that for those really windy days. So on this particular day, it was incredibly windy and I hung my backpack off that hook so it would weigh down the tripod and it would shake less in the wind. Now, a little trick with this is that you want the bottom of your backpack to touch the ground so that the wind won’t make it swing, which would also cause movement on your tripod.
What lenses should I leave at home?
Another thing that I look for with saving weight is to try not to bring lenses that have an F 2.8 or a really wide type of aperture because this means there’s going to be more glass in the lens and it weighs a lot more. And this was a big decision, but I got rid of my 70-200 F2.8 zoom lens. And because it was F2.8, it was just really, really heavy. So I sold that one and downgraded and got one that is an F4 zoom lens. And it weighs about a pound less because it has less glass.
Speaking of lenses, another way that I save weight is with my wide-angle lens. Now I have a Nikon 14-24mm wide-angle lens. I love that lens, but it weighs a ton. So if I’m going on a backpack, landscape, photography trip, I will leave that lens at home and bring along a 20mm prime lens. It’s F 1.8. So it’s perfect for dark sky Milkyway shots, and it saves about a pound of weight.
DSLR Vs. Mirrorless on a backcountry photography trip
The other thing I’m aware of when I’m on a hiking trip is the issue of batteries. Now I do not use a mirrorless camera. I find that mirrorless cameras eat through batteries very quickly.
One of the things that I really have to watch for when I’m on this type of a backpacking trip is to not use live view on this camera because it sucks the battery dry.
And I got a lot of questions asking me, Hey, is the Nikon D850 the way to go? Or what about the Z7 or the Z6? Well battery life. When you’re on a hiking trip, you don’t have anywhere to charge your batteries up. And unless you want to be bringing along 10 batteries, then you might end up carrying around a dead camera for a couple of days, watching the perfect sunsets pass you by. This is where having the good old, single lens reflex viewfinder it’s optical analog, old school, no batteries to die quickly. And, um, yeah, so that’s why I’m using the viewfinder and not the back screen on this one.
What other photography tips do you have for me?
 Adventure landscape photography is incredibly rewarding because you get to do two things at the same time. Number one, you are creating your own fine art. And number two, you are exploring and enjoying the great outdoors. Now, if you are not using an RV or camper van for at least some of your landscape photography, adventure trips, then you are missing out. Check out my article on why I love adventuring with an RV here.
And if you’re new to landscape photography in general, I have a fantastic video series that’s completely free, and contains some amazing tips. Learn about the 4-step system I use to take all of my photographs in the backcountry. Best of all, there’s free, quick-reference guides that you can print out and bring along so that you don’t have to worry about being in cell service.