
 Reducing noise without degrading image quality can be tough. But over the years, I’ve learned a number of techniques for reducing noise without paying for expensive Photoshop plugins. There have been many times where I was traveling without a tripod to save some weight and ended up needing to boost my ISO. The best photo opportunities always happen when you’re not prepared, right?
This article is going to go over a number of different techniques for reducing noise, starting from the basic controls, and going into some more advanced, or niche methods of reducing noise in Lightroom. An important note is that there is no method of noise reduction that won’t also reduce the sharpness of your image. But many steps do contain controls that’ll save the sharper parts of the image, and reduce the noise in the spaces between the lines. There are also some plugins for Photoshop that can do a really impressive job of reducing noise, but they’re costly, and sometimes ineffective.
And sometimes, it’s even possible to use the noise to your advantage. Many people out there love the look of film grain, and even digital noise can look cool if it’s used in the right situations. So let’s get started.
Using Luminance in the Detail Panel
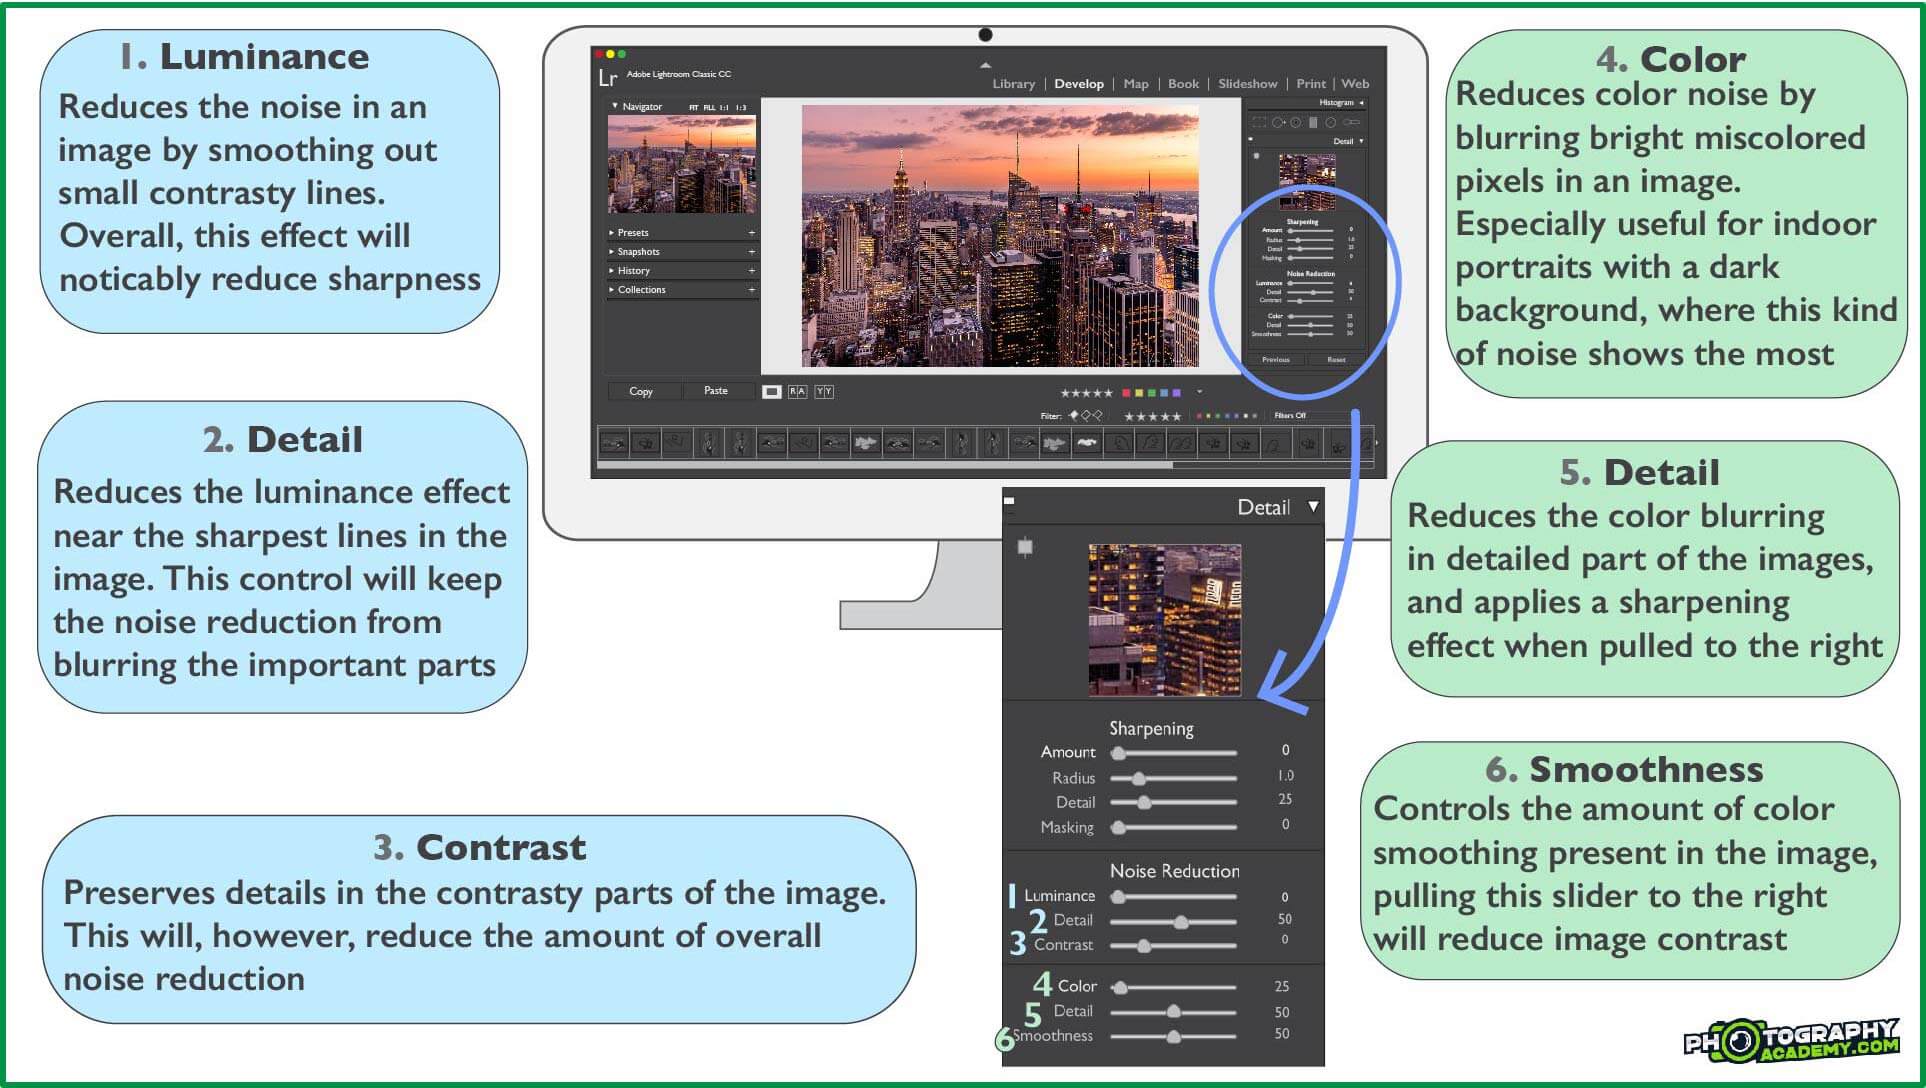
The noise reduction controls are found in the Detail Panel in Lightroom Classic’s Develop Module. The controls are categorized under Luminance and Color, which both play different roles.
Luminance decreases the overall noise in an image by reducing the detail. Using the Contrast and Detail sliders, you can change the luminance to only affect the non-sharp areas between sharp lines. But doing this will effectively decrease how much noise reduction can be achieved. Take a look at this example below to see how luminance can affect your images without using the detail and contrast sliders.
Pulling the luminance up high makes images look like it had vaseline spread over the lens. As well, noise reduction can eat stars if you’re photographing the night sky. So it’s important to keep it under control. These controls should be used sparingly. You’ll have better noise reduction results with the goal of getting noise under control, rather than completely removing it. As always, subtle changes are more powerful than large ones.
Color noise reduction works much differently. This type of noise reduction seeks to reduce the bright green, pink, red, and blue pixels that occur on the dark spots of an image. This one doesn’t affect the details in an image, so it is much less destructive than luminance. However, once those specs are reduced, there will still be visible noise in the image — it just won’t be in color.
[twenty20 img1=”2114″ img2=”2115″ offset=”0.5″ before=”Noise Reduction without controls” after=”Noise Reduction with Contrast and Detail sliders up”]
The image above on the left shows how moving the luminance slider to the right will reduce image detail. Revealing the image on the right will show how to control the noise reduction using the detail and contrast sliders just underneath luminance.
Removing noise using the texture slider
Adobe added the texture slider to Lightroom Classic CC back in 2019. Since then, it’s proven to be a really powerful slider for noise reduction. You can reduce the texture overall using the slider in the basic panel, or to certain regions of an image using Local Adjustments, like the adjustment brush or gradient tools.
If you’re using the texture slider for an overall noise reduction, I’d suggest using the Sharpening tools in the Detail panel to bring back a bit of extra detail along the edges. Holding Alt while dragging the Masking slider to the right, you can select just the sharp edges of the image to apply the sharpening adjustment. This way you’ll be able to reduce the noise texture, while keeping the edges sharp.
Using an adjustment brush can also be really powerful if you have some noise in a dark background section of the image. There won’t be much details in the dark, out-of-focus background section anyway, so this is generally safe.
Unfortunately, the noise slider for local adjustments isn’t all that effective. In all of my testing in the past, it’s been mostly useless for reducing noise.
[twenty20 img1=”2161″ img2=”2163″ offset=”0.5″ before=”Overall grain added” after=”Zooming in on the grains”]
Adding grain can reduce digital noise in an image — but it does so destructively, by blurring the image slightly and adding faux film grain to the image. This is a very niche attribute that some people find pleasing, and others absolutely loathe. Move the slider to the right to see a closeup of what the film grain does.
Adding Film Grain
This one is a niche, quasi-solution. Some love it, others abhor film grain. But one of the unique effects of adding film grain to an image in Lightroom, is that it actually decreases the noise present in an image. The grain and vignette controls are found in the Effects Panel in the Develop Module.
The Amount slider controls how grainy the image is. Size controls how large the individual grains are, and reduces sharpness. And Roughness controls how coarse the grain is — all the way from how the first film images appeared on the far right, to modern low-ISO t-grain films on the left.
By moderately increasing the grain size control, the sharpness reduction will reduce the ISO noise and replace it with film grain. This isn’t exactly a solution to excess noise, but it can produce some interesting, and surprisingly pleasing results. Try it out, and if you hate it, let me know in the comments down below.
Last resort: Go Black and White
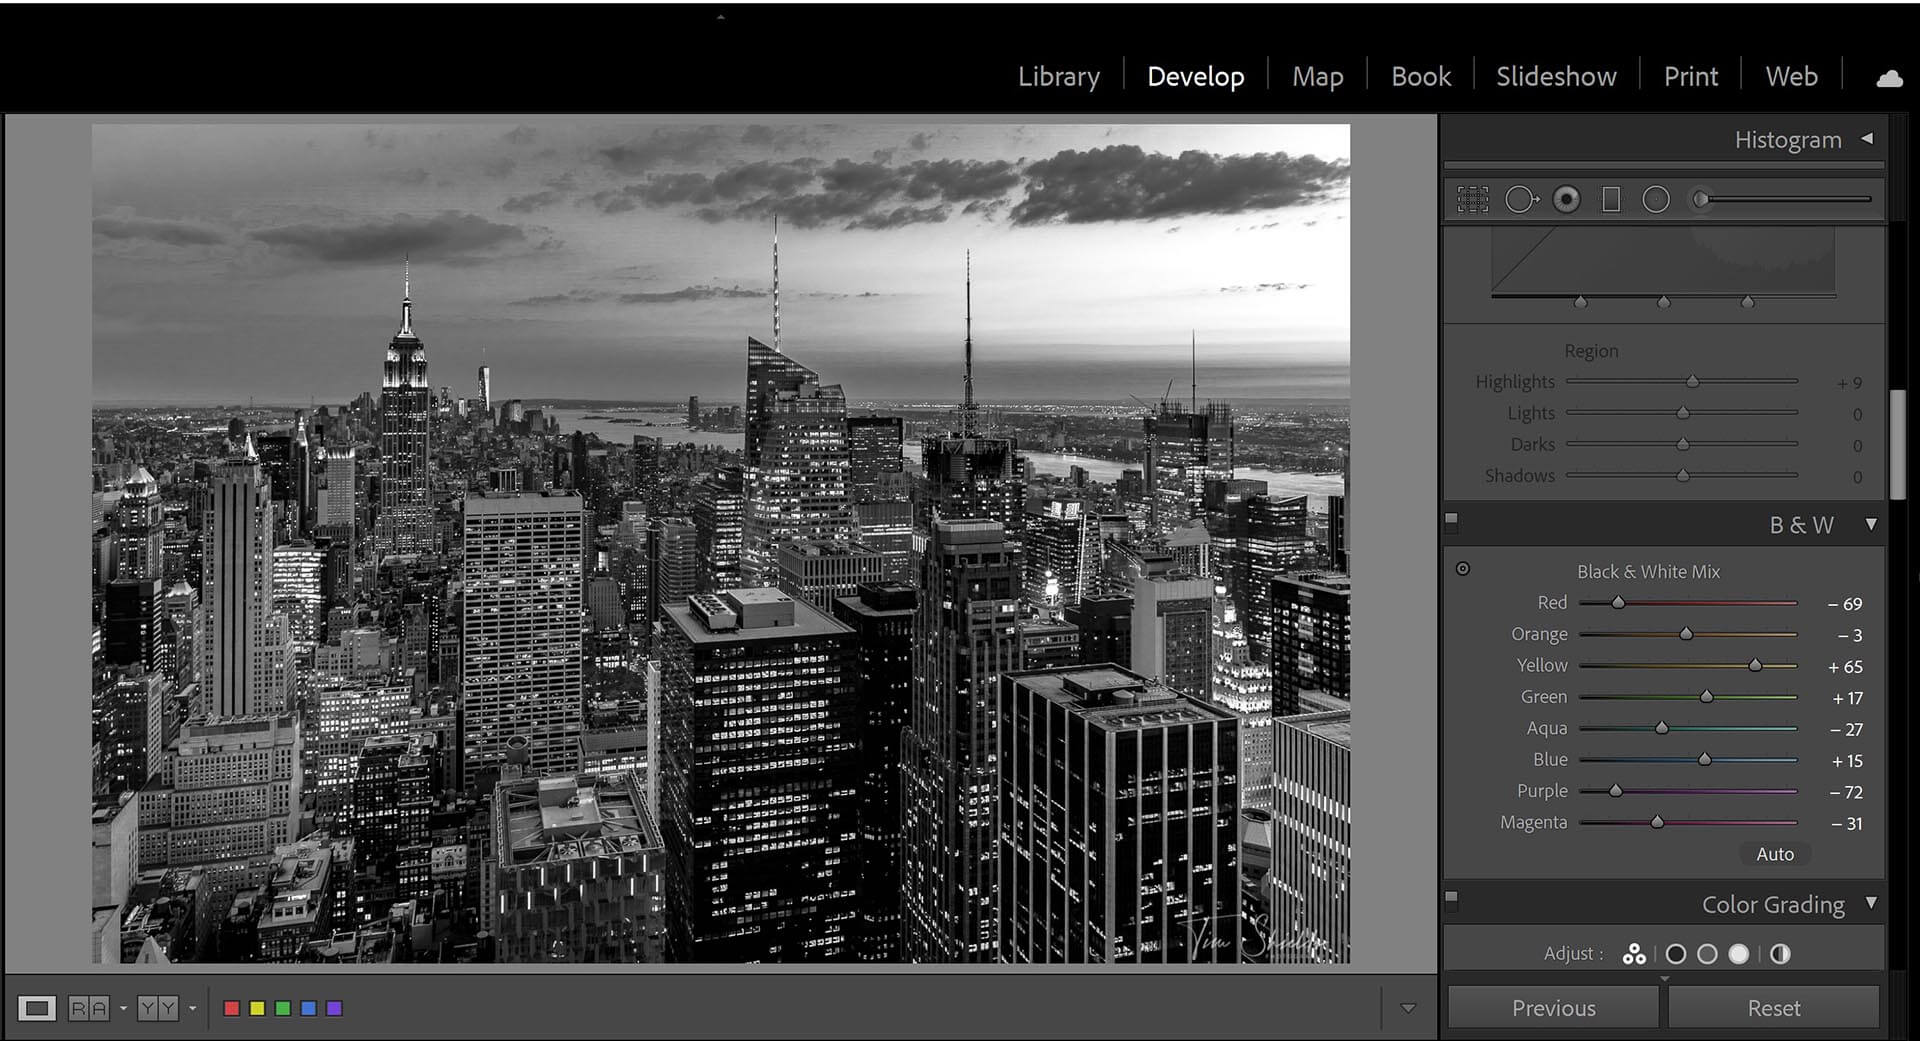
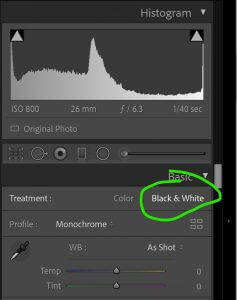 Often if an image has too much noise, the colors won’t be representative of the scene. Changing or adjusting them might also make the noise more visible. So a simple fix that will give you more control over the image contrast is to turn the photo Black and White. Usually, this is the last resort. B&W can turn trash images into works of art.
Black and White photos can be dodged and burned more effectively than color images. One of the biggest challenges of brightening sections of an image that were in the shadows is that the resulting colors are more muted than their well-exposed neighbors. So turning a photo black and white completely negates that problem, and will allow you to dodge and burn to your heart’s content.
When the photo is turned Black and White, the HSL panel turns into B&W. This panel will allow you to control which colors are in the highlights, and which ones are in the shadows. Using these controls can add some brilliant contrast to your images that are otherwise not possible in color photos. To learn more about image contrast and color theory, take a look at this article.
Should I use in-camera noise reduction?
Some cameras will have Noise Reduction options. This Noise Reduction will take effect when using high ISO values, during long exposures, or simply every picture. Each camera has different options available. In general, these work the same as using the luminance slider in Lightroom. But the biggest downside is that you don’t get to control how they work. If you want a quick fix, these controls may be useful. But for most people, I suggest turning these controls off.
For one, I’d prefer to have the maximum amount of control when I’m reducing noise so that I can keep as much detail in the image as possible. And when these are turned off, they may be reducing the sharpness in my images. And when sharpness is reduced, there’s no getting it back. In the worst case, these controls can eat stars. Astrophotography is one scenario where in-camera noise reduction absolutely must be turned off.
Combining images to reduce noise
If you’re able to use a tripod and don’t want to use a long exposure, it’s completely possible to reduce noise by combining images. Using HDR, you can combine two or more photos to reduce noise, while increasing both sharpness and tonal range. Even if the images are the same exposure, using the HDR merge function can effectively reduce the noise in the resulting image.
This is because in any two images at the same exposure, the noise will appear differently in each pixel. So by merging these images, Lightroom is able to choose the most representative pixels for the scene. If you’re a fan of going out and taking sharp photos at golden or blue hour, try this method out. But these won’t work for Astro or northern lights photography.
How can I learn to take better photos without upgrading my gear?
 This is a question that I get asked a lot. The interesting thing is that professional photographers can get professional results no matter what camera they have in their hands. The biggest difference between amateur and pro photographers comes down to knowledge and planning. I’ve developed a 4-step system to help you learn to plan and take photos like a pro in no time! Learn about this easy system by signing up for my free webclass here.
Happy shooting!
Tim
