
Over my years as a photographer and photo editor, I’ve run into almost every problem in the book. At one point or another, I’ve had to learn how to overcome almost every issue possible. Having experienced all of these has made me a better photographer, knowing how to anticipate certain problems and take steps to mitigate them before even stepping out the door.
It doesn’t matter what skill level as a photographer you are, there are always going to be some issues that you run into from time to time. This list is mostly problems that many beginner photographers will face, but there are also a lot of advanced tips in this quick guide. So reading through this list should give you a good understanding of some of the situations you may face throughout your photographic journey.
1. My images aren’t sharp when I zoom in
The biggest goal of every photographer off the beginning is to get their images as sharp as possible. Often YouTubers and reviewers will show you examples of work that’s tack sharp, even when zooming in 300 or 400%. That wasn’t possible years ago, as film just wasn’t able to handle that much detail. But in today’s world, even many entry-level cameras are able to create that look and feel. So what’s happening when you’re zooming in and not seeing sharp images?
The biggest cause of images not being sharp when you zoom in is motion blur. Tiny movements in the camera while the image is exposing can make lines blurry. The best way to fix this is to use a faster shutter speed, or use a stabilizer like a tripod, and a remote shutter release to reduce the appearance of camera shake.
Camera shake is definitely the case if the image feels sharp when you’re zoomed out, but falls apart when you take a closer look. It’s especially problematic with high-megapixel sensors that are capable of capturing immense details.
When you want to handhold the camera, photographers will suggest using a shutter speed that matches the focal length of the lens, known as the reciprocity rule. That means using a shutter speed greater than 1/50th of a second when shooting with a 50mm lens. But higher-megapixel cameras require you to go a bit faster, especially with longer lenses. When I’m shooting with a 70mm lens, I’m usually using a minimum shutter speed of around 1/200th of a second to be sure there’s no shake.
If you need to use a slower shutter speed, it’s always advised to use a tripod.
2. I’m using a tripod, but still seeing motion blur
If you’re still finding there’s motion blur in your images when you have it on a tripod, there’s usually a couple of problems.
The main issue that’s most likely to cause motion blur when you’re using a tripod comes from pressing the shutter button. You can reduce camera shake on a tripod by using a 2-second timer, or by purchasing a shutter release cable.
It takes a surprising amount of force to press the shutter button. No matter how hard I try, I always notice that I move the camera slightly. The simplest way to ensure this doesn’t happen is to use the 2-second timer built into your camera. But using a remote shutter release can be even better, as they typically have additional functionality to create time-lapses, and do other cool things. Remote shutter releases can almost always be found online for super cheap. So they’re a worthwhile tool to have in your kit.
3. I’m using a remote shutter release and a tripod, but I’m STILL seeing motion blur
Sometimes, you can be doing everything right and still see the camera shake in your images. There are a couple of tips that can further reduce shaking. But it usually comes down to two factors. The wind, and mirror slap.
Modern cameras have to move that mirror out of the way at what seems like the speed of light. When it hits the top, the force of that movement coming to an abrupt stop may vibrate throughout the camera and cause some shake. So some cameras have a setting called Mirror Lockup. This will lift the mirror so that it doesn’t introduce any shake into your image, but it means that you can’t focus or recompose the image while this setting is on. So get all of your settings correct, then turn on mirror lockup, set a two-second timer, and shoot away!
The next issue is wind. Tripods are built to be steady, but they lose some of that steadiness when they’re raised as high as they can go. This is especially true for lightweight versions with extra leg extensions, like travel tripods. If you’re experiencing shake, try to get the tripod as low to the ground as possible where it’s the steadiest. The next tip is to use the hook on the bottom (of most tripods) to attach your camera bag. This extra weight can stop the wind from affecting it. Just make sure the bag is touching the ground so the wind doesn’t pick it up and add to the shake!
4. The leaves and trees in my image are too blurry
Shaky leaves and trees are another unfortunate side to long shutter speeds. Often, when you’re trying to get some motion in the clouds or create reflections in the water the wind will move the leaves and cause some extra shake. In your images, the lack of sharp features can be a distraction.
The two ways to solve blurry leaves and trees in your image is to use a faster shutter speed or combine two images with the same settings, but different shutter speeds. Make sure to take the images on a tripod with the same white balance, and the same exposure value to make the process easier in post. Layer the images in Photoshop, and use the masks to bring together the parts of the image that you want to capture.
Just increasing the overall shutter speed for the image is much faster, but it can’t always create a better image. Sometimes you’ve just got to work with what you’ve got.

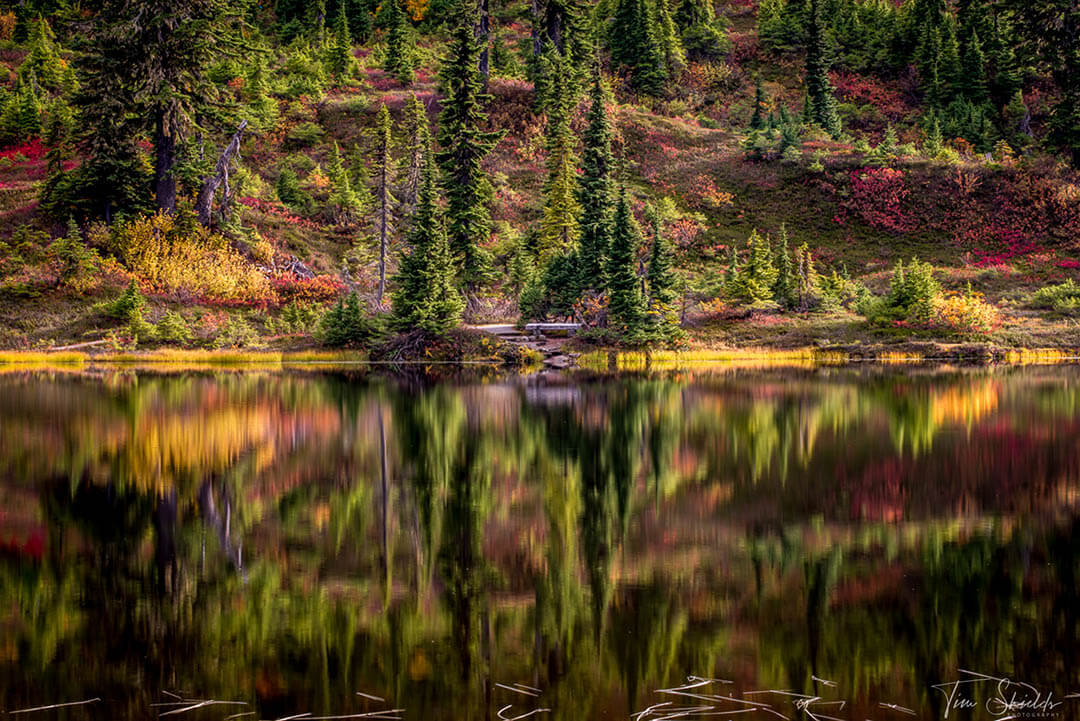
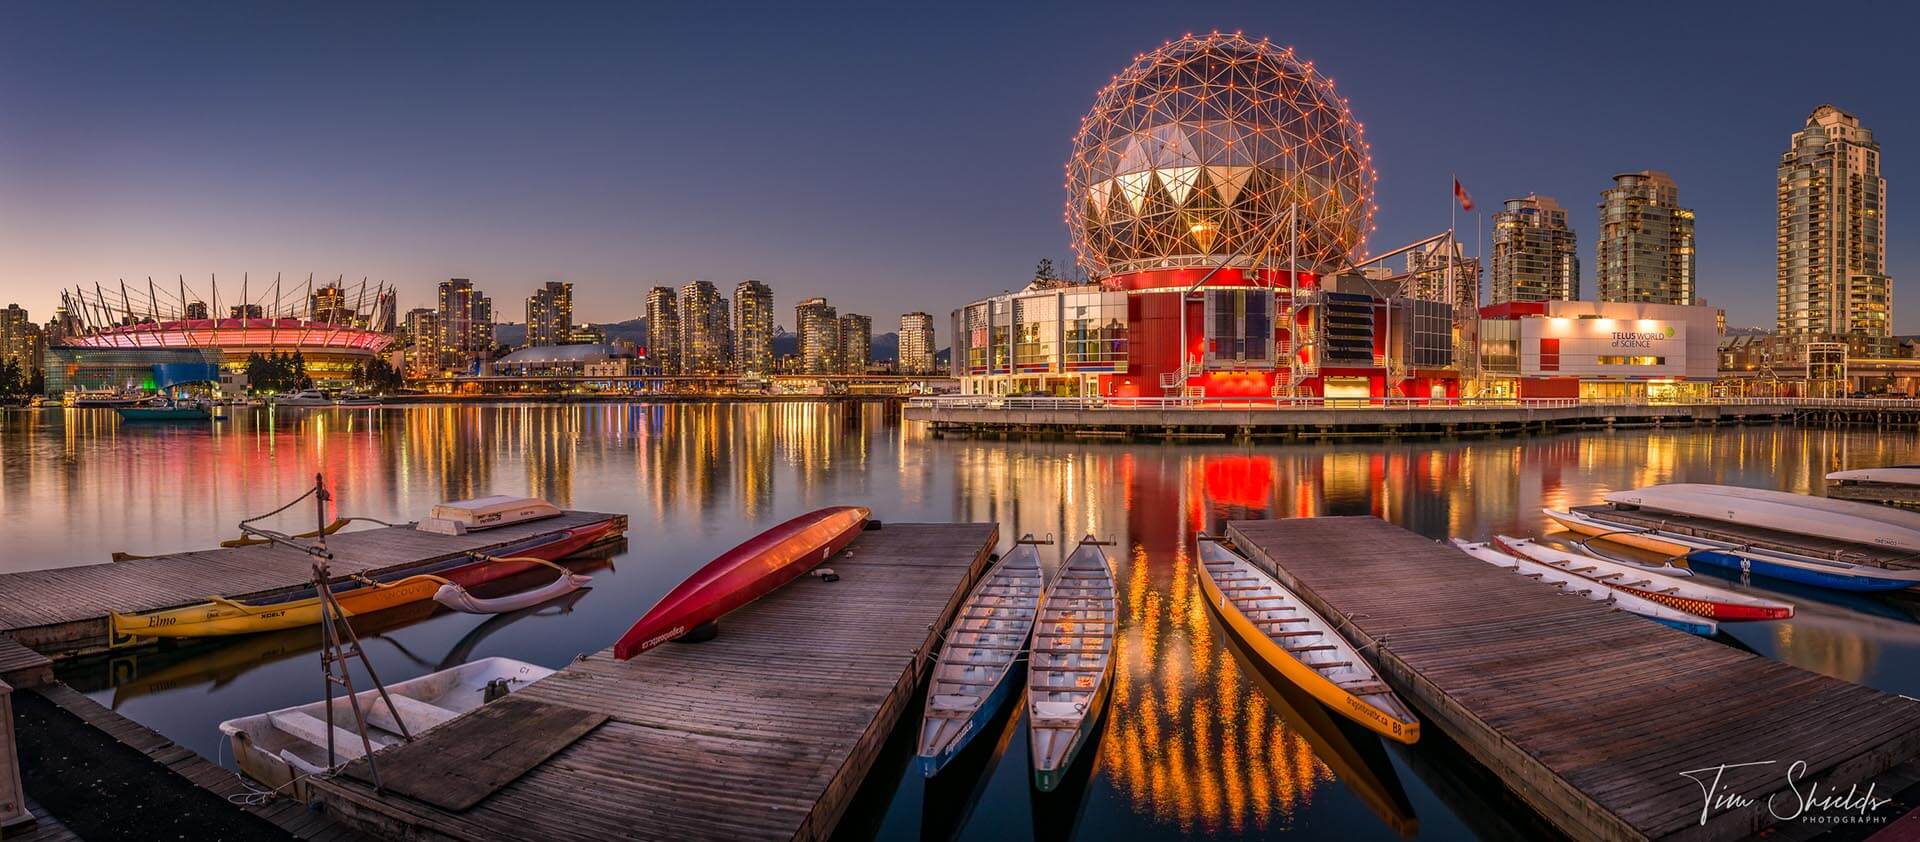
5. I used a slow shutter speed, but the water is still too choppy
One issue that plagues photographers is not having a wind-free moment to get those gorgeous reflections off lakes. Photographers use these moments to create intricately balanced compositions.
But there comes a point where the wind is so strong, slowing down the shutter speed isn’t going to create a sharper reflection. When that happens, the best move is to wait and see if the wind calms down a bit and gives you an opening. If it doesn’t happen, you can come back another day, or look for a smaller puddle. Smaller puddles along the edges of lakes don’t succumb to the same forces, meaning it takes a lot more wind to affect them. Seek one of these out, get close, and you might just be able to capture that reflection you’ve always dreamed of.
If you’d like to learn more about shutter speed and landscape photography, I wrote an entire article on the subject here.
6. What if I can’t get a slow enough shutter speed to blur motion?
There are certain times where it’s impossible to get a slow enough shutter speed to blur the water. In the middle of the day you could be using ISO 50, F/22, and still need a 1/125th shutter speed to keep from blowing out the highlights.
In that case, you need a good ol’ fashioned Neutral Density (ND) Filter. These evenly block out all spectrums of light to darken your image. A 5-stop filter is usually enough to get a 1s exposure mid-day, but you’ll need more to get those super long exposures that are able to blur out clouds. Keep your camera on Auto White Balance (if you can) to avoid large color casts from the ND Filters.
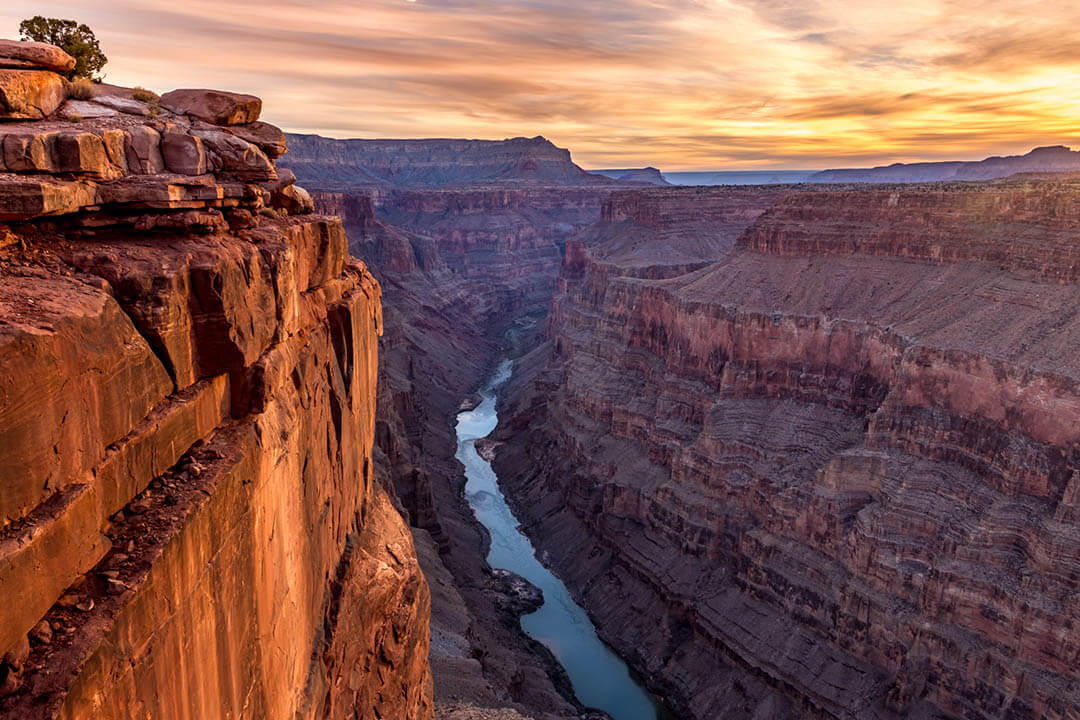
7. Everything except my foreground is in focus
When you’re using a longer focal length lens like 70mm or more, it’s very common to see the first sections of your image are out of focus. If you’re a portrait photographer, this is a great effect. But for landscapes, it’s a bit of a problem. You’ll always want to make an image that’s sharp front to back to really wow your audiences. And many times the scene requires a longer focal length to make that background larger and more striking.
The best way to fix this problem is to use focus stacking. Take multiple photographs with different parts of the foreground in focus (sometimes up to 10 or 15 photos depending on the focal length and how close you are to the ground). Bring the photos as layers from Lightroom Classic into Photoshop. Go to the Edit menu, and choose Auto-Blend Layers. Then click ‘Stack Images’ and uncheck the ‘Content-Aware Fill Transparent Areas’ option. If you took the photos on a tripod, there shouldn’t be any transparent areas to fill, but this option can cause some issues.
Then, the resulting stacked image should have way more of the foreground in focus! Adobe has some amazing automatic tools that just make this job so easy.

8. One of my subjects is in focus, but the rest of them aren’t
The main problem that you ran into here is using too wide an aperture, but there are other factors that create a small depth of field as well.
A wider aperture, or a smaller f/stop number, will create a shallower depth of field, which is just a fancy term for how much of the image is in focus. The other factor is focal length, and distance to the subject. A longer focal length, like 200mm, will produce a shallow depth of field up to 30 meters away. While a shorter focal length, like 24mm, may only produce a shallow depth of field up to 5 meters away.
But if you’re closer to your subject, less of the scene will be in focus. So to compensate, you can use a smaller aperture or a larger f/stop number. A smaller aperture will reduce the amount of light, so you’ll either need to use a longer shutter speed or boost the ISO to compensate.
You can learn more about the exposure triangle in this article.
9. I used the smallest aperture, but my image isn’t sharp?
A common piece of advice to new photographers is to keep your aperture as small as possible to make your images sharp from foreground to background. But when you go too far, the hole that light passes through becomes so small that waves of light interact with each other when they spread out to fill the sensor.
This interaction is subtle, but it can completely ruin the sharpness across the sensor. That’s why most photographers suggest sticking around f/8 and f/16 to get the complete image in focus without having to worry about lightwave interaction ruining sharpness.
10. Half of my image is sharp, and the other half isn’t
Every now and then a photographer or friend who follows my work comes to me with a unique problem. The left half of their photograph will be tack sharp, but the other half is weirdly blurry.
The first question I always ask is if they’ve recently dropped the lens. What happens is one of the elements inside the lens has shifted, causing the direction of light to change inside the lens. This problem is known as a decentered lens, and it can be difficult and expensive to fix.
In most cases, small bumps and drops aren’t going to decenter a lens. It’s usually from something much harder, like taking a 10-foot fall directly onto asphalt or cement that can damage a lens in this way. If that happens, send it off for repair asap.
11. My image has a lot of colored spots, and doesn’t feel clean when I zoom in?
A lot of new photographers end up with some really noisy images at first. Especially if you’re shooting on full auto modes in low light. The camera doesn’t always know what settings you need for the situation, and it can’t tell when you’re on a tripod. So when the light gets low, the DSLR will try to increase the ISO so that you can still hand hold the image. But that means you’ll often come home with some very noisy images.
Think of ISO like the gain knob on an amplifier — when it’s increased, the signal sent to the amp is increased, but it sounds crackly. The same thing is happening on your image sensor. It becomes more sensitive to light, but it’s not a clean signal. So the images start having strange colors appearing, and the images lose sharpness, especially along the fine lines.
The best way to get cleaner results is to use a lower ISO and a tripod. The tripod is by far the most useful tool for all landscape photographers because it’ll allow you to use the lowest possible ISO in all situations, making clean, crisp images every time.
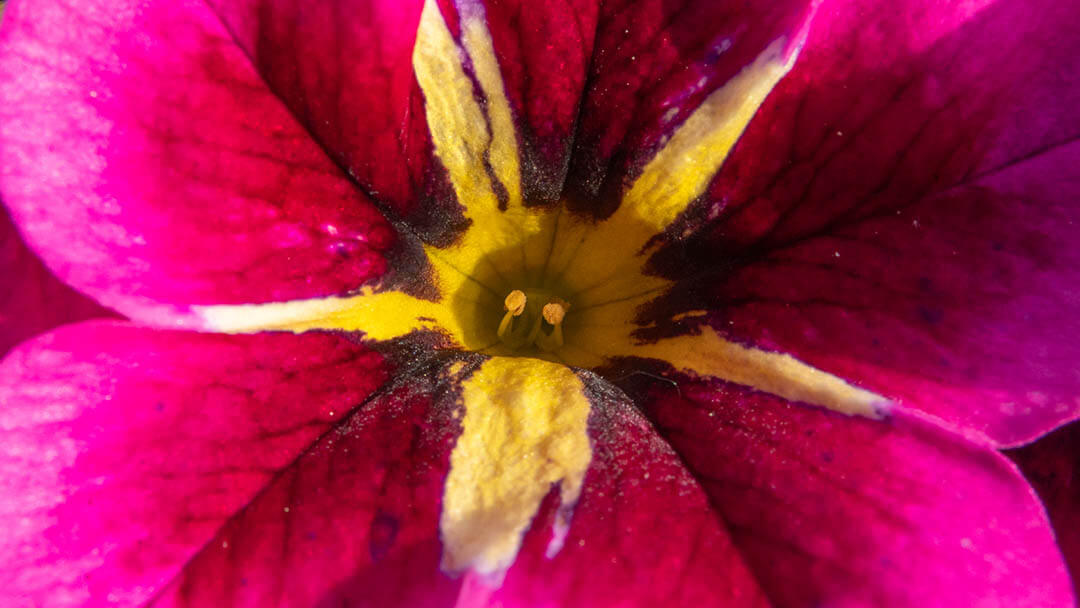
12. How Focus Closer to Flowers without a Macro Lens
Getting up close and personal to flowers and insects can make some extremely dramatic photographs. There’s nothing cooler than being able to get all of those details onto your camera’s sensor. But most lenses out there aren’t able to accomplish this task all that well.
Wide-angle lenses can usually focus closer than telephoto lenses. But since these lenses have a wider field of view, they don’t necessarily magnify any better. So what’s a photographer to do? You could go out and spend big money on a dedicated macro lens. But you could also purchase a simple tool called an extension tube. These are little spacers that go between your lens and the camera body. They further magnifying the image that’s rendered onto the sensor by spreading the light out further across the sensor. This will allow you to get way closer to an insect, mushroom, or flower, and create some dramatic shots!
The downsides of extension tubes over macro lenses are that they don’t allow you to focus your lens at infinity while they’re attached. So you’ll need to remove them before taking any other kind of photo
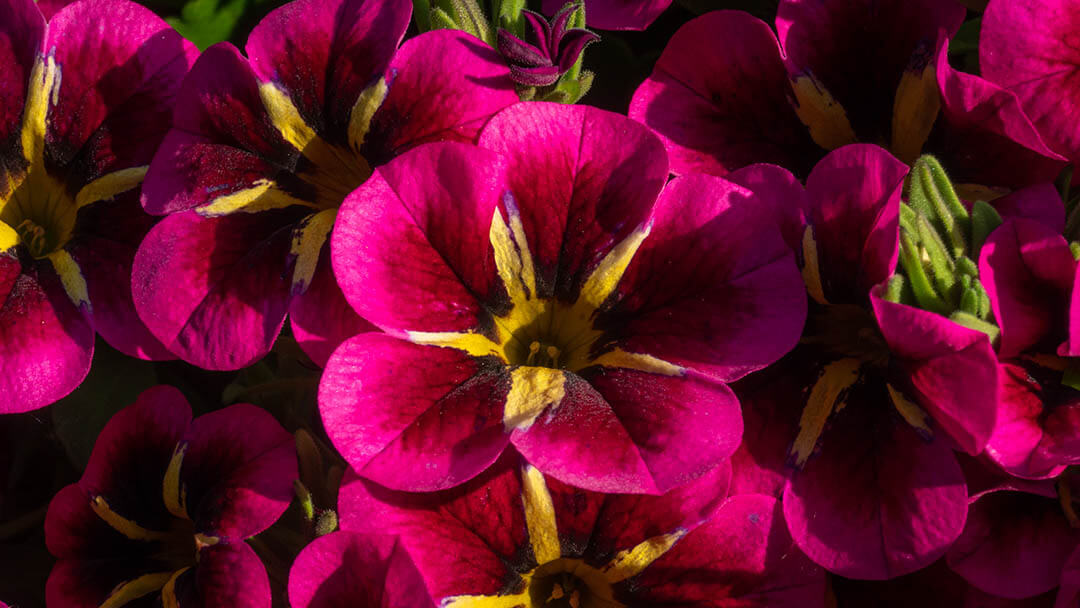
13. I’m using extension tubes, but the corners of the image are out of focus
The next downside of macro lenses is that the corners just aren’t as sharp as on a dedicated macro lens. That’s because dedicated macros are designed to create a flat field of focus, where non-macros don’t worry about it as much.
Light comes into the lens from all angles — especially with wider lenses. So getting a perfectly flat focus is nearly impossible without optics dedicated to this task. If you really need that corner sharpness, start by using a longer focal length, like 85mm or 200mm, as these lenses will not suffer from curved focal planes as much as wider lenses. If your corners are still too soft, then it may be time to purchase a dedicated kit.
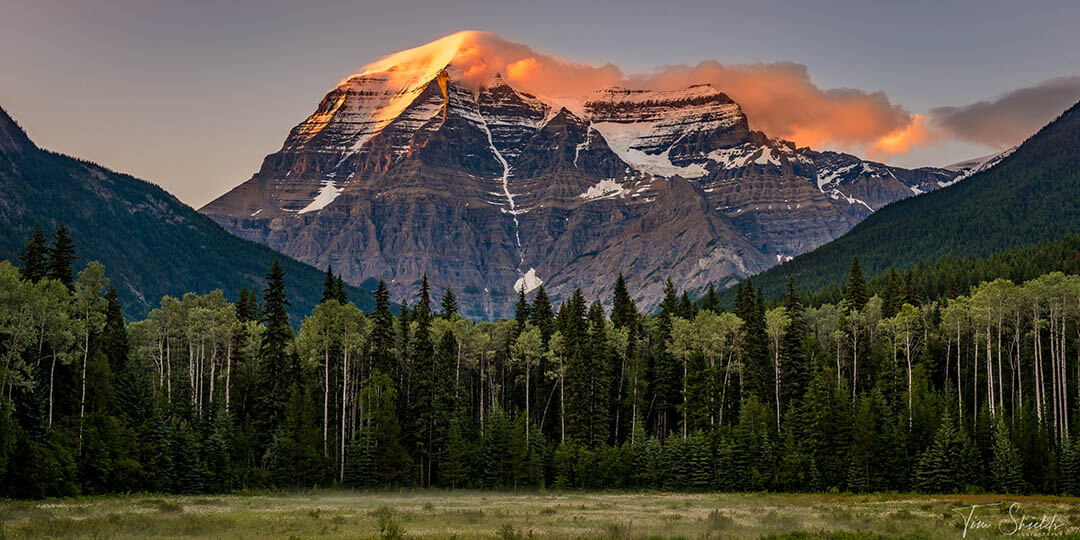
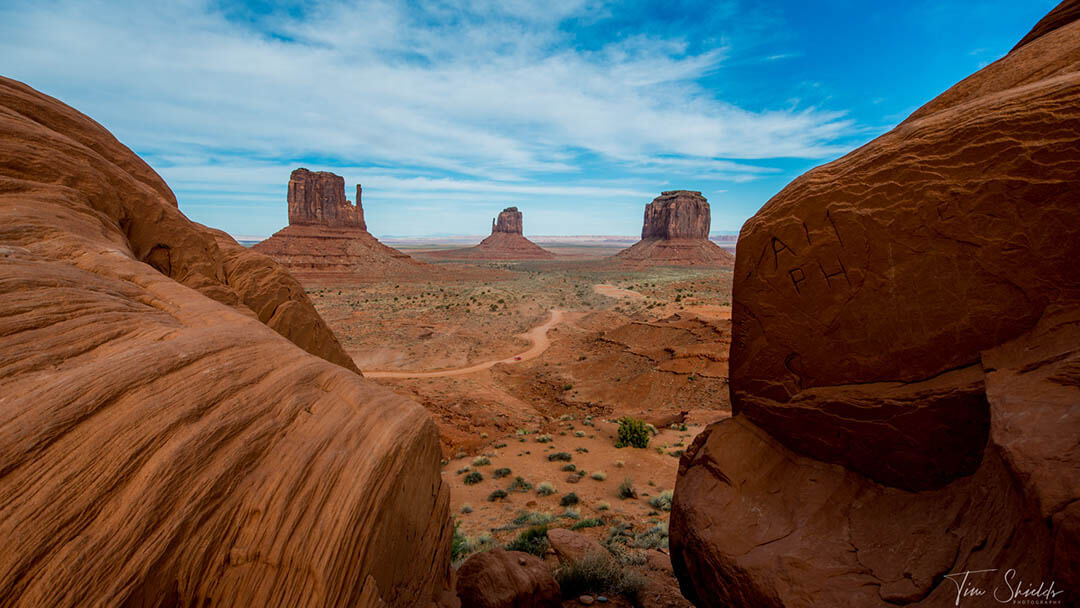
14. The mountains looked huge in person, but tiny in the photo?
Everyone who’s taken a photograph with a mobile phone has been through this issue. You got up long before sunrise, hiked out to your destination to capture the perfect sunrise, only to get home and see that everything in the distance looks kind of… pathetically small.
The issue here comes from wide-angle lenses. These types of lenses, like a 16-35, are great for most scenarios. But the further away your subject is, the smaller it’ll be in the frame. This is because of the lens distortion, where closeup objects look huge, but far away ones are small.
So the best way to fix this is to use a telephoto lens, like a 24-70mm or 70-200mm. These telephoto ranges will bring the background closer to you, making it look majestic and fierce in that sunrise/sunset light. But of course, closer objects in the foreground will be out of focus. So you’ll need to learn how to focus stack from the quick guide above.
15. My location looked stunning in person, but the photo doesn’t look as interesting
This is a classic complaint of every photographer. There have been many times where I’ve carried my entire heavy kit up the side of a mountain and saw a stunning scene with my eyes. But then when I get home, the images are just kind of lame.
Part of it comes down to the fact that things that look really cool in person, don’t always make great photos. But a bigger part of the picture is that there’s not enough contrast in the scene, and there isn’t a focal point. There needs to be something to lead the eye around the frame, whether it’s a vignette, a leading line, or a negative space. But the eye has to land somewhere to make it an interesting, and powerful photograph.
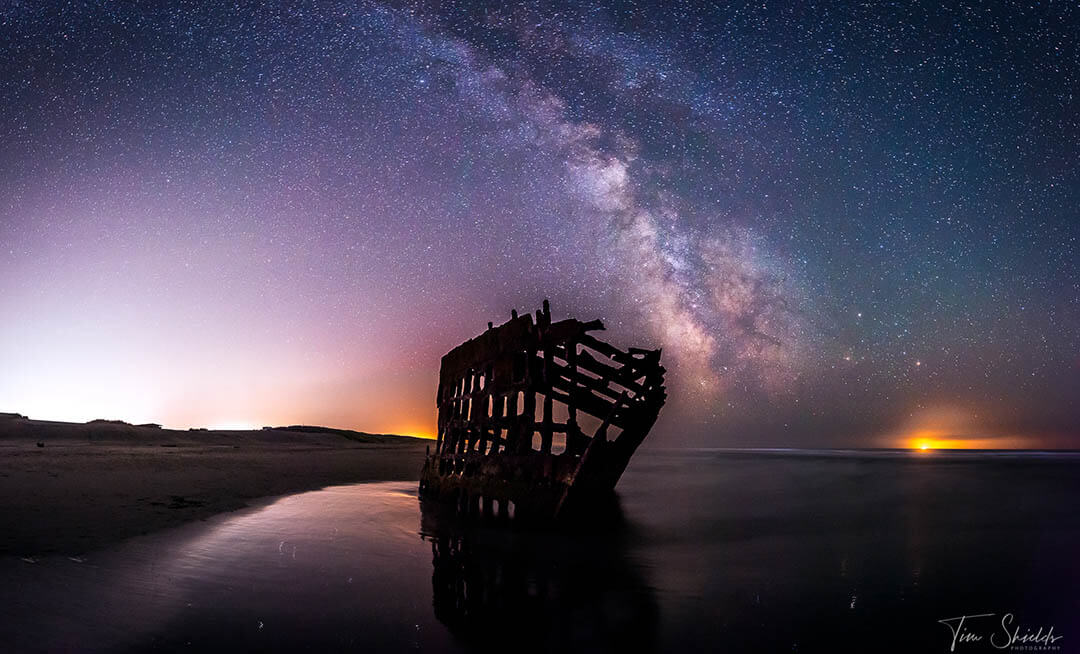
16. My lens isn’t wide enough to capture the scene. Do I need a new one?
There are times when you need a wide-angle lens and many many cases where it’s just not necessary. If you’re shooting the Milky Way, a 28 or 35mm lens isn’t going to be wide enough to capture the scene and some foreground. And in the case of astrophotography, the stars move across the sky. Making it impossible to use techniques, like panoramas, to get a wider field of view.
The other time when you’ll need to use a wider lens is if you want to accentuate the features of a large house or boulder in the scene. There are many cases where it’ll be necessary to use a wide-angle lens to get the look you’re going for.
But for landscape photographs, it’s actually better to use a telephoto lens and create a panorama on a tripod. This is because the telephoto lenses help to bring the background closer to you in the scene. They make the mountains and scenes look majestic, and true to life.
17. The sky is beautiful, but the landscape itself is too dark
Oh man, you just ran into a classic conundrum of photographers everywhere. The dynamic range of the scene was more than what the camera could capture! It’s one of those sad realities, where cameras just can’t see as much as our eyes can — at least yet.
This is where HDR photography comes in. This is a process that combines two or more images to capture the entire dynamic range of a scene and spit it out into one single, low-contrast image. All you’ll need is a tripod and then take three images. One two-stops underexposed, one properly exposed, and one final image two stops overexposed. Then combine them into an HDR in Lightroom, and go about your regular workflow!
Read more about making HDR images here.
18. The Landscape is bright enough, but the sky has white patches?
This happens all the time to photographers without knowing. You take an image, and the brightest parts are completely overexposed. But unlike underexposure, blown-out highlights are completely unrecoverable.
Part of the problem is that you can’t see this on the back of the camera. Sometimes the differences between highlights that aren’t blown out and those that are are so subtle, it’s noticeable until you go to fix it in post. The best way to make sure this doesn’t happen to you is to use the Histogram on the back of your camera. This little graph will show you where most of the exposure of the image is. If it’s too far to the right, the image is overexposed. Too far to the left, and it’s underexposed.
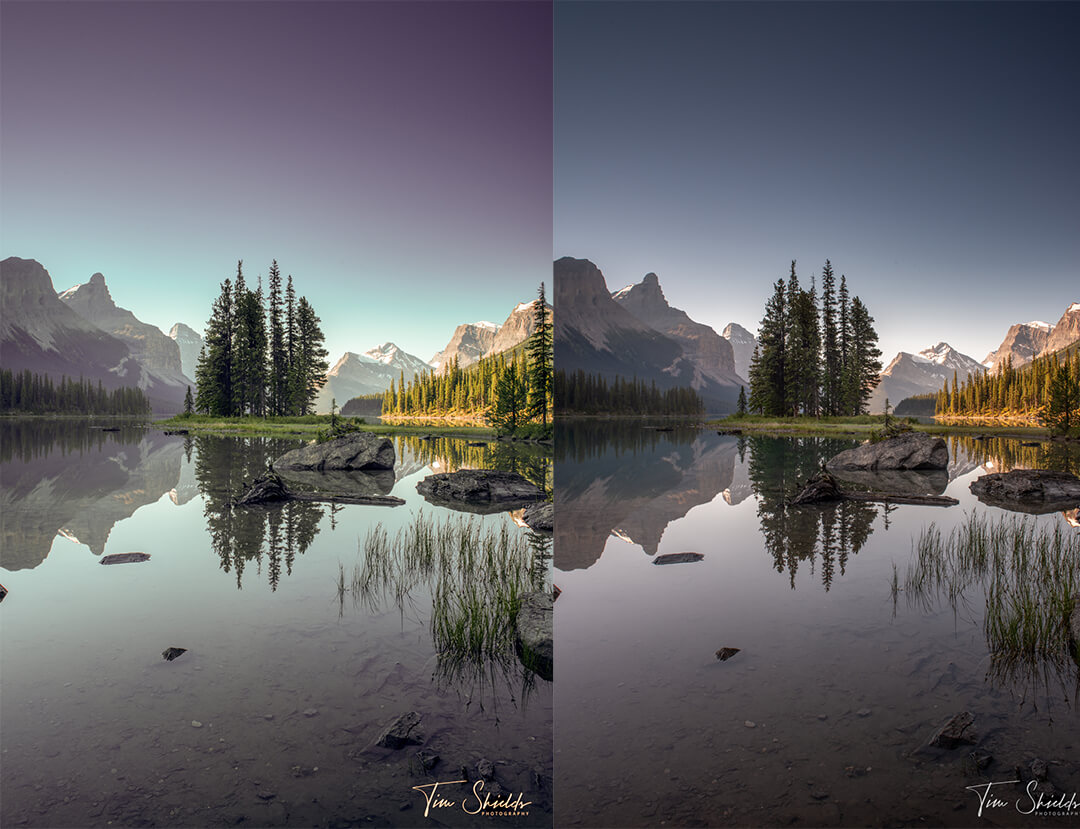
19. When I use HDR, my images look fake
We’ve all seen bad HDR images. Back when digital photography was just starting out, people always took the medium too far. They’d turn up the sharpness, contrast, and saturation to 11 and post it online like it’s the latest craze to take over the world. And for a while, that was kind of cool. But thankfully we’ve recovered from that movement.
But today, we have the opposite problem. The main reason that your HDR images might look strange these days is that they lack contrast. When you first create one of these beauties, there often isn’t much of a difference between highlights, shadows, blacks, and whites. This makes editing them much easier, but at first, they look kind of weird and unimpressive.
Start editing them in Lightroom by adding back some of that contrast. Pull up the whites, by moving the slider to the right, bring the blacks slider down to the left. And then the image will start to resemble real life again.
[twenty20 img1=”1877″ img2=”1891″ offset=”0.5″]
20. My images aren’t looking as dramatic as other photographers
When your photos aren’t looking dramatic, it’s most likely because there isn’t enough contrast in the image. And I don’t mean to fix this by pulling the contrast slider all the way to the right and call it a day. There are many different kinds of contrast, and different ways to accentuate it in post-production.
There are three main types of contrast that I think about every time I’m taking and editing a photograph. Light and Dark Contrast, color contrast, and blur/sharp contrast.
The simplest one to use when taking a photo is blur/sharp, as this is affected by your composition. Photographers create this contrast by blurring out water or using bokeh to blur out the foreground or background.
Color contrast is a bit more tricky. This is the type of contrast that requires accentuating opposing colors. The easiest way to do this is to take a photo at sunrise or sunset. The time of day where the sky is orange, pink, and red — the opposite of the greens, browns, and blues usually found in nature.
I’ve got a whole series on contrast. Learn about editing contrast here, and composing photos for more contrast here.
21. I shot Jpeg, can I still edit the photos?
The problem with shooting in Jpeg mode is that it bakes the look into the image. If the camera interpreted the scene on the cool end, and you’d like to warm it up, you might have some trouble getting everything to look right. It will only be able to be brightened up so much before the image falls apart as well.
So you can still edit the image, but you’ll have to be careful. The subtler the changes, the more likely it’ll still be a good shot in the end. RAW files, on the other hand, don’t compress any of the details. So you’ll have all of the information available to adjust to your heart’s content. That means that the white balance made by the camera is just a suggestion, and can be changed at will without destroying the image.
For this reason, I always suggest using RAW formats when shooting anything that may have value to you. And even if it doesn’t I firmly believe you’re better off leaving the camera shooting in RAW formats. Because I, like many others, never think to turn it back to RAW before starting another shoot.
22. When I print my image, it looks pixelated and poor quality?
If the image isn’t printing well, the main reason is that it isn’t high enough resolution for the print. That can mean that you are printing the image too large, cropped the image too much, or used the wrong export settings before sending it off to the printer.
When exporting the image in Lightroom Classic, you want to ensure that your image is set to 300dpi, 100 quality, and is large enough for the size that you’d like to print it at. In the export dialogue, change pixels to inches just to be sure. If it’s larger than the paper size, you’re golden.
23. My image looks good on my computer, but bad when I upload it to Facebook
Another classic conundrum that I see people talking about all the time on Facebook and Instagram. These two social media networks need to serve a lot of images to keep people on the site. If they showed everyone’s 5Mb 300dpi, 32-bit Adobe RGB images, they’d quickly lose users who run up enormous cell phone data bills. As well, the pages would be so slow that nobody would want to visit the site anyway, and their advertisers wouldn’t have anyone to show their ads to. Not a great business model.
So Facebook works hard to optimize your images in a way that they can show the world without draining your Gbs. That means the larger image you upload, the more ruthless the Facebook compression algorithm is going to be.
For best results, upload images that are 1080px on the long edge, 72 PPI, around 75 quality, and using sRGB. This should make the image about 300kb. Facebook will still optimize it, but not nearly to the same level as they would for a 5Mb image.
24. I can’t focus on the stars at night
No matter how good of a camera you’ll get, photographing the stars will always be a problem. Most cameras just don’t know how to focus on a tiny spot billions of miles away.
The absolute best way I’ve found to ensure you’re focusing on the stars is to use live view mode at night, and zoom in as far as possible on the back of the camera. Once you’re there, slowly move the focusing ring back and forth until you get it perfectly sharp. And then, leave the camera in manual focus, and don’t touch the focusing ring! If you do, you’ll have to repeat this process over and over again to get it just right.
As a side note, always avoid just turning the autofocus until the lens elements stop moving. Modern lenses actually have a point of focus that’s past infinity to accommodate for hot weather changing the shape of the lens elements. So when you turn that ring all the way, everything will be frustratingly out of focus.
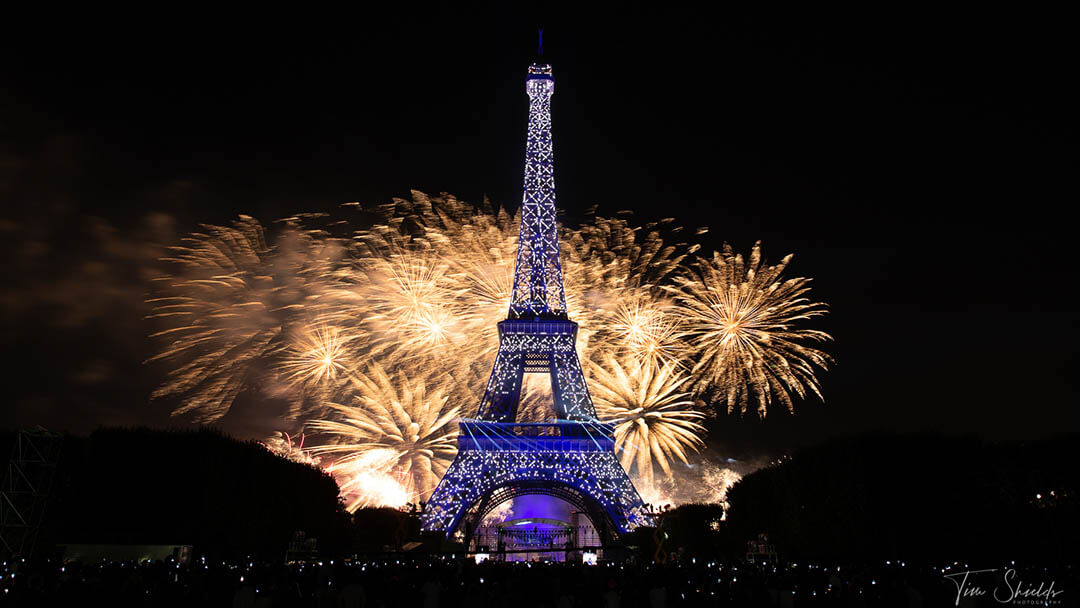
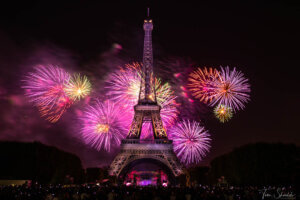
25. The fireworks are too chaotic, or not big enough?
Fireworks take some work to get just right. The biggest issue is that they’re expensive, so a good show only lasts 10-15 minutes. Which also happens to be the maximum attention span my kids have after waiting for a half-hour in the cold. So maybe that’s for good reason.
Either way, if you’re just learning how to shoot fireworks, that amount of time won’t be enough to get the formula down. Luckily, I’ve shot a ton of fireworks in the past and found the best settings to capture brilliant fireworks. In my experience, each shot lasts about 4 seconds from when it starts shooting up, and when it’s fully expanded. If you shoot longer than this, you’ll capture the fireworks falling slightly, which will ruin the image sharpness. Too short, and you’ll get stubby fireworks.
With a bit of practice, you’ll be able to get the timing for when to hit the shutter just right.
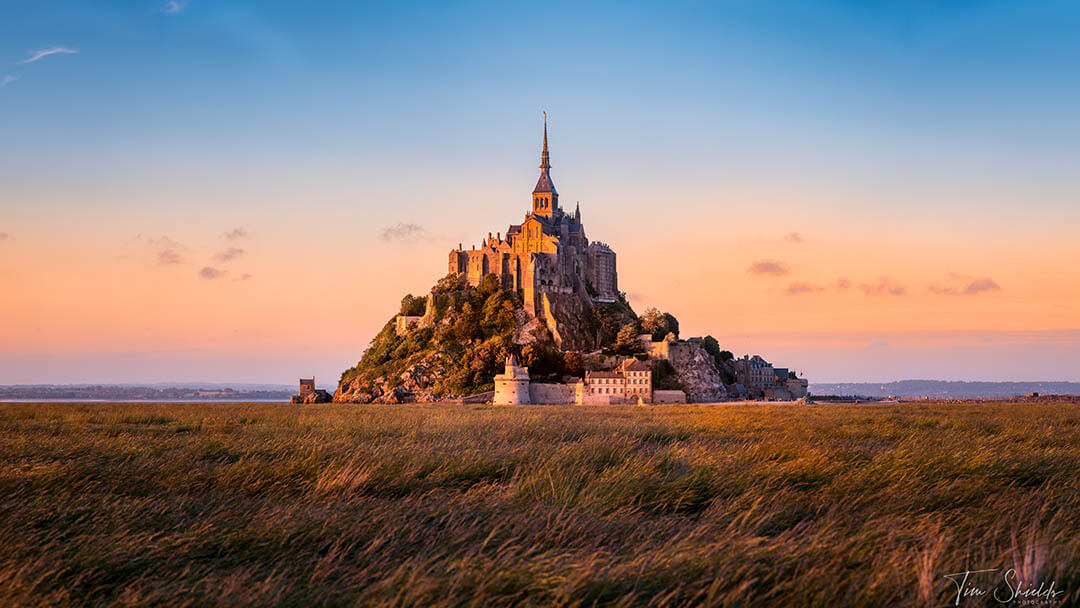
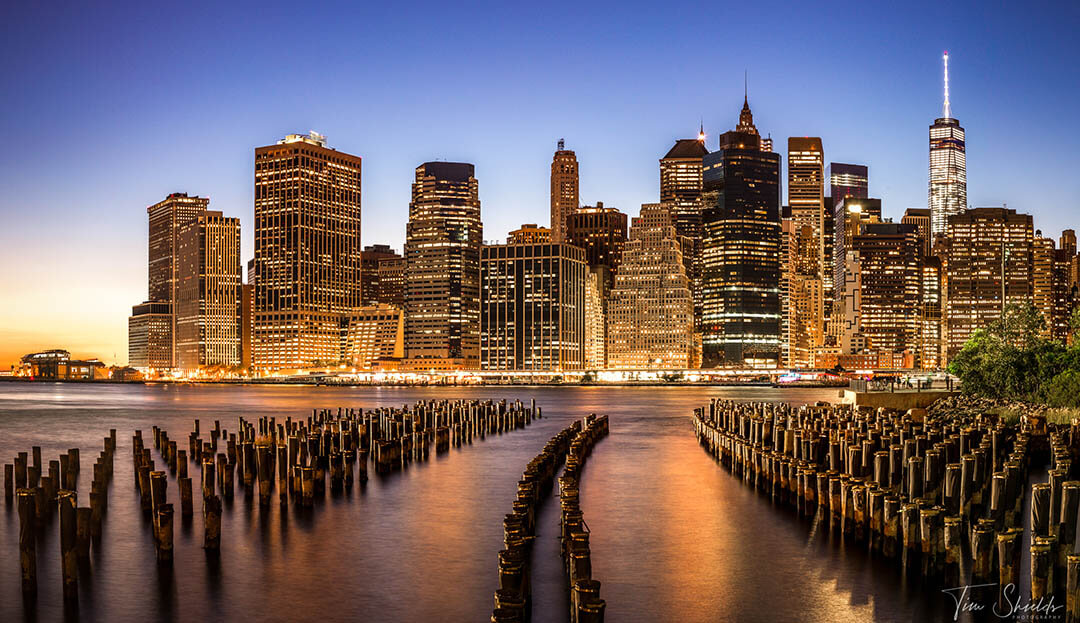
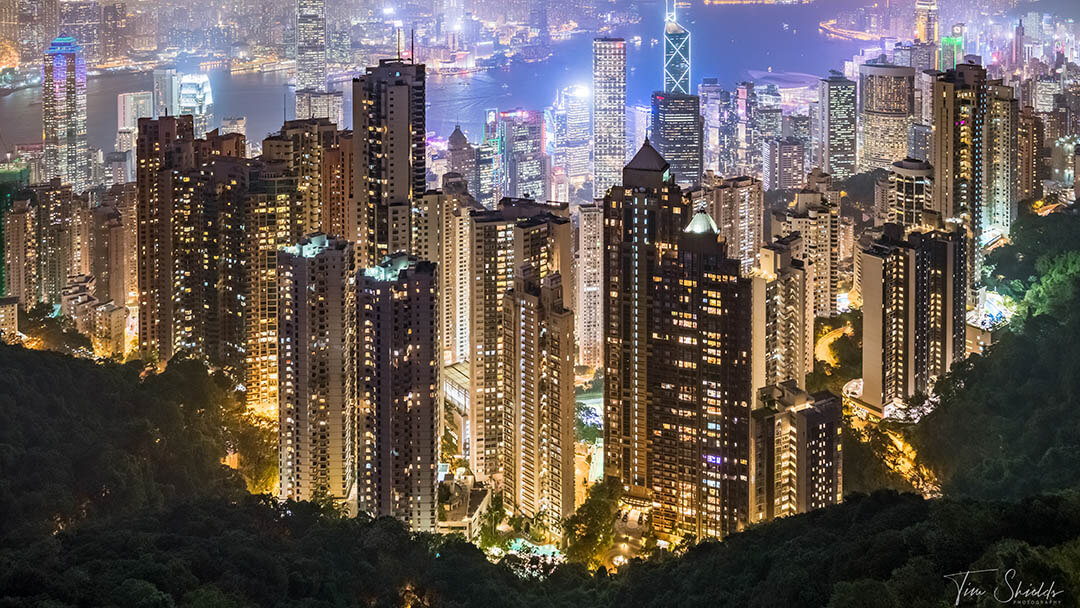
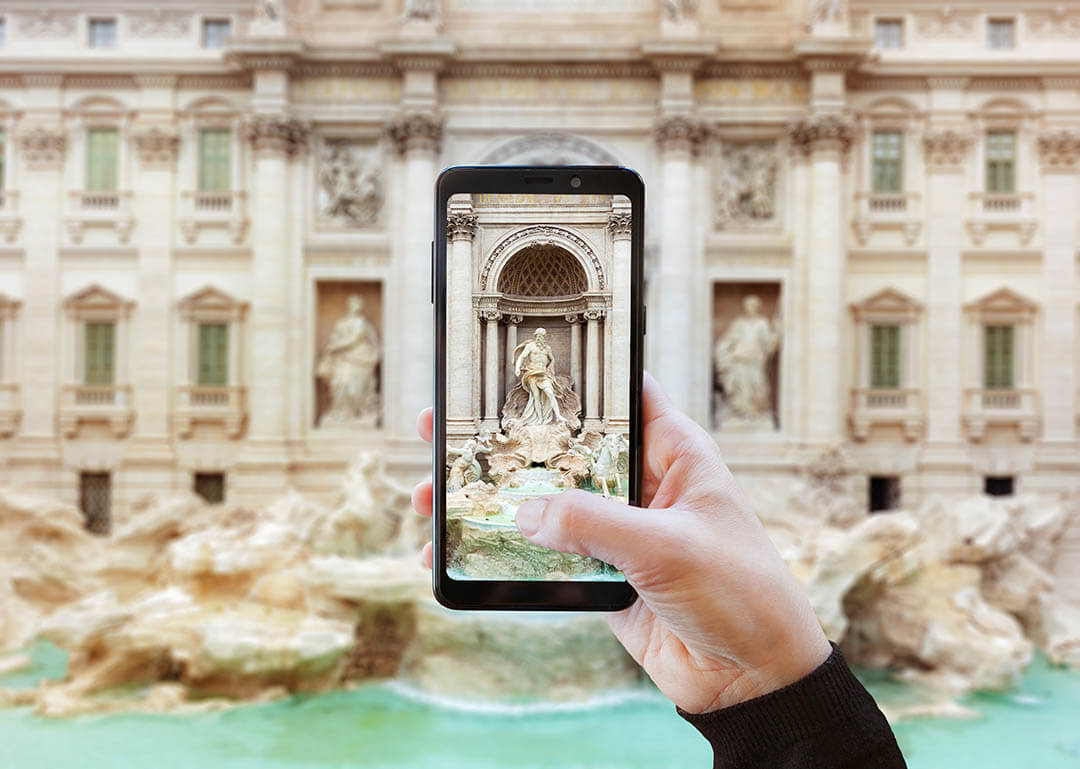
26. There are too many people in my photograph
Sometimes, it feels like there’s no place left on Earth without people. Of course, unless you go to Canada. But that’s another story.
If you’re traveling around the world, you’ll often want to stop and take photos at some of the famous landmarks. Otherwise, how else will your Instagram audience know you went to Paris if you didn’t get a photo of the Louvre? And what’s even the point of hopping over to Italy if you’re not going to take your turn holding up the Leaning Tower of Piza?
But that’s not the point. When you’re out taking photos of some of the cool, well-known spots, it’ll often feel like the entire world is standing there with you. And when that perfect light hits, they’re all trying to get the same shot you are. So how do you get them out of the frame without coming back another day? The answer is Image Stacking.
Set up a tripod, take 10 or more photos about 10-20 seconds apart so that there are free gaps throughout the image. This should give you all of the details of the scene. Then, load the images as layers into Photoshop, select all, and use Auto-Align Layers. If there’s even a slight discrepancy it could cause some parts of the image to become blurry.
Combine the photos into a smart object, and then go to the Layer drop-down, go to Smart Objects -> Stack Mode -> and click Median. This will remove all of the objects that are moving between the frames! So if there’s a parked car, or signs, those are going to stay. But cars passing by, and pedestrians moving around are going to be removed from the image. That’s why you’ll want to take the images over 1-2 minutes, to ensure even the doddlers are out of the frame.
If the crowd is very large, you’ll need to spend a lot of time. Prepare for 15 minutes to a half-hour of shooting. At this point, you may need another image specifically for the sky, as the best light there may last only a minute or two depending on where you are.
I’ll have a full article on this one coming soon.
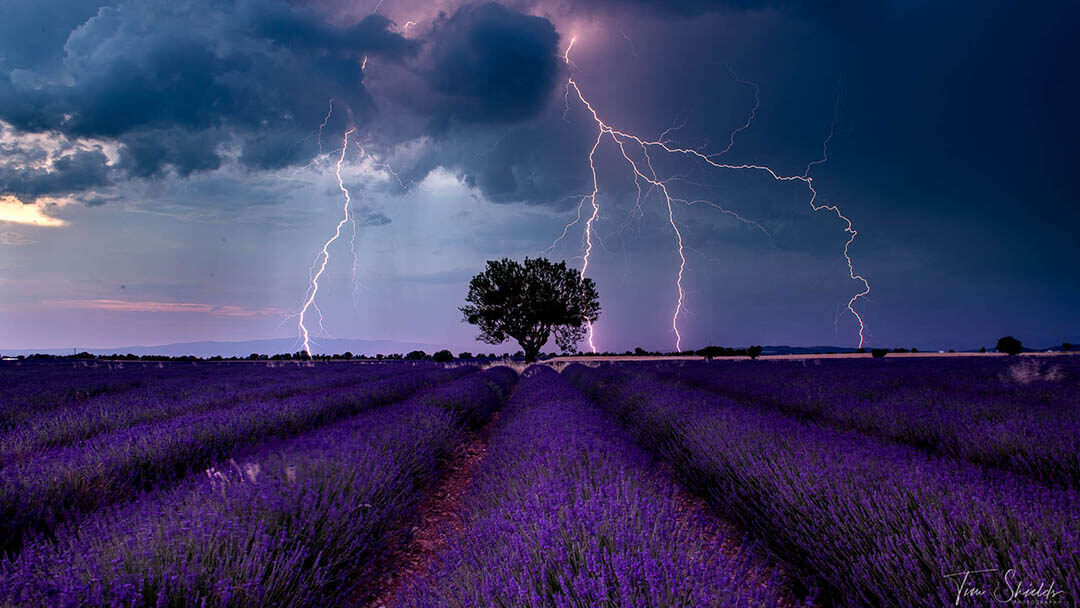
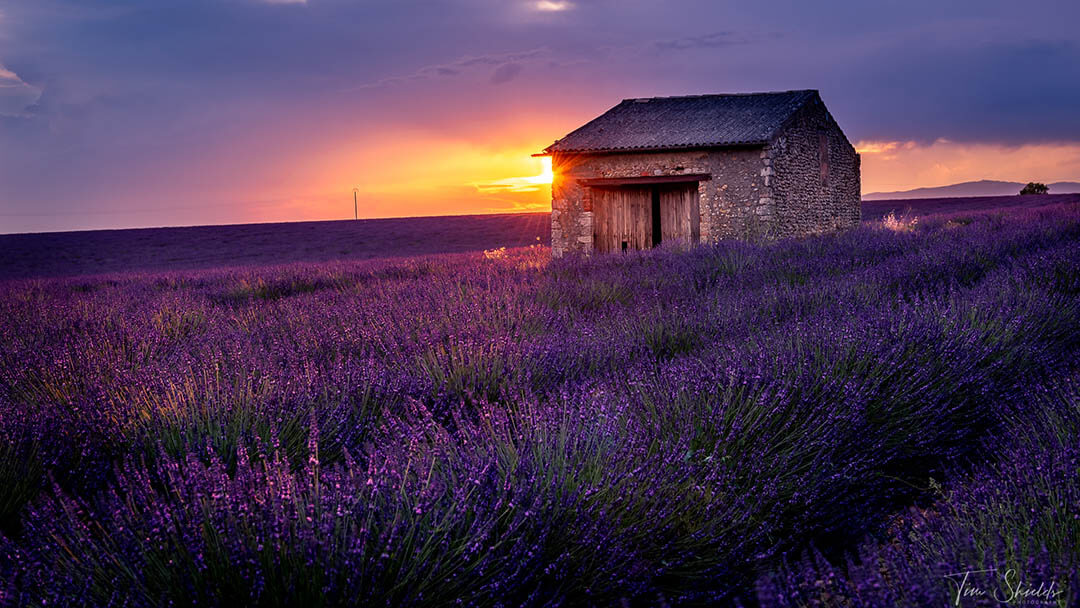
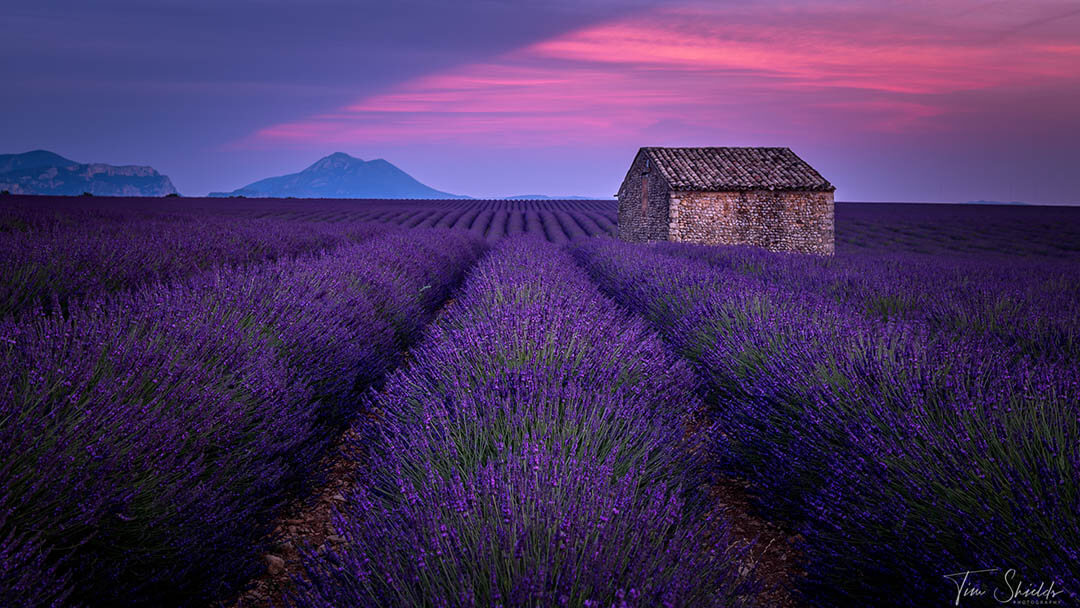
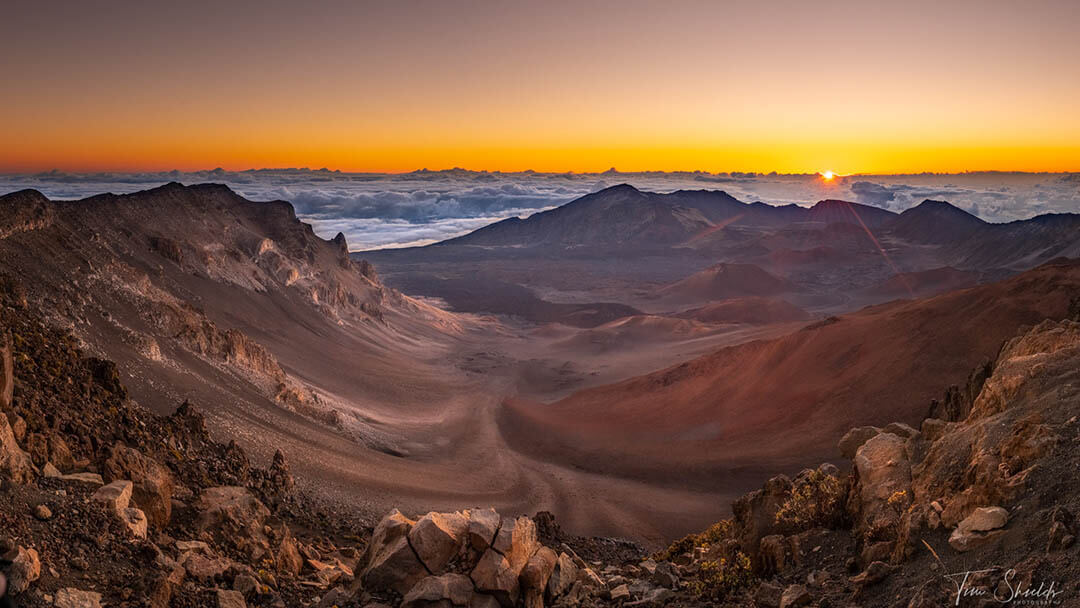
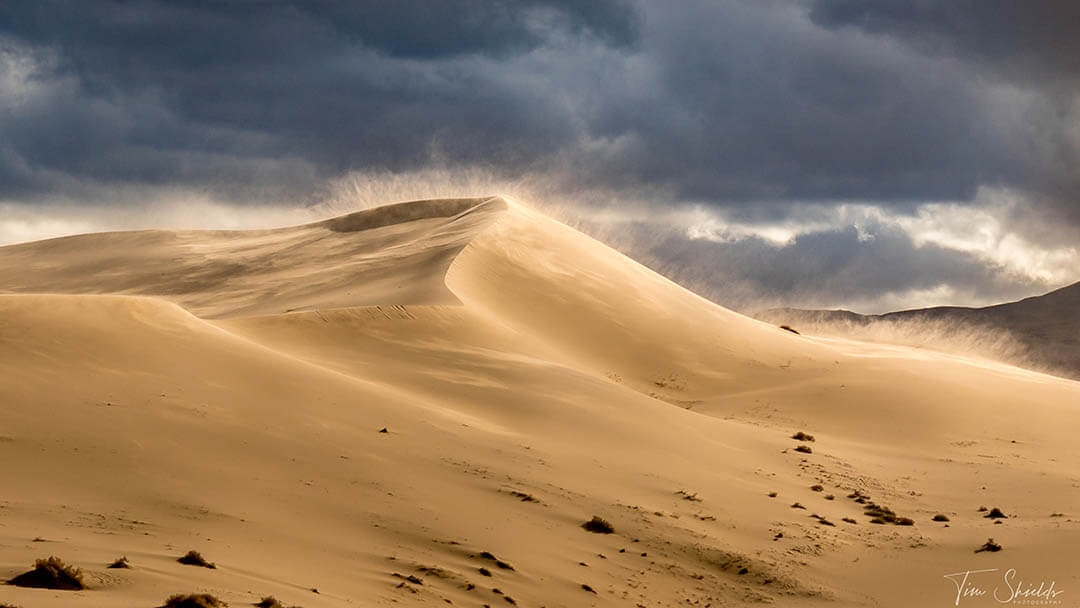
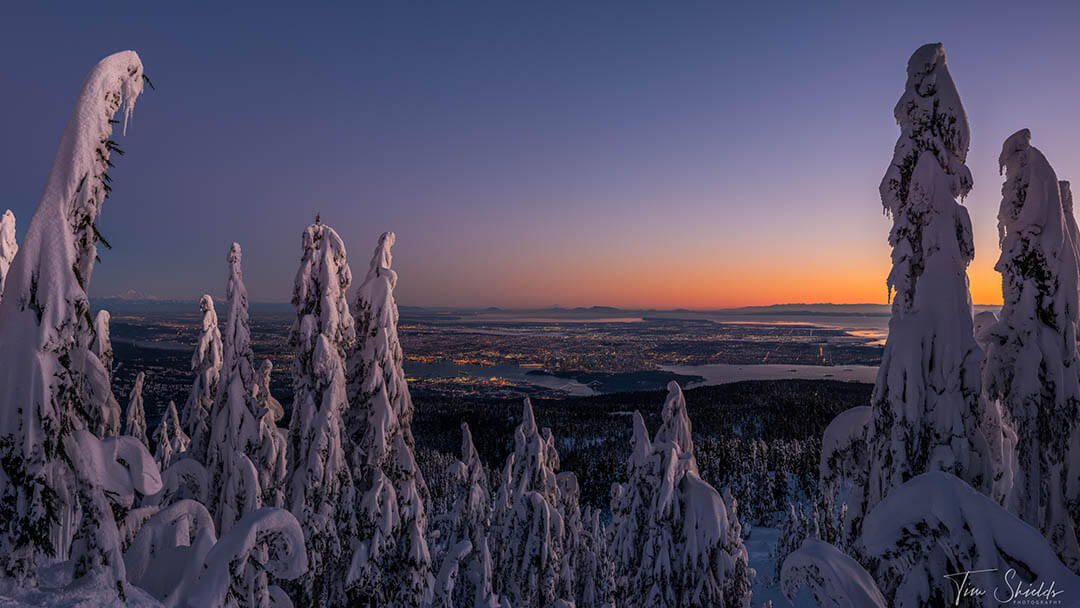
27. Finding the right weather for landscape photography
It’s no secret that the best landscape photos require some drama in the skies. It’ll always feel like the best weather for photography happens when you don’t have a camera in hand. Part of the reason is that the most dramatic skies typically happen when after the rain. This is because that’s the time of day when there are the most clouds in the sky. Also, the effect of the clouds breaking up and showing the light creates contrast.
The best sunsets happen when the sun is able to reflect off the bottom of the clouds just before it passes over the horizon. At this point, the sun is going through the maximum amount of atmosphere, causing the small amount of light to shift colors. So the best conditions happen when there is a good amount of high cloud to reflect those golden and pink hues back down to us.
But is it possible to predict this? Never 100%, but with a little knowledge and the right app, we can get a pretty good understanding. Learn more about how I can predict a good sunset with decent accuracy here.
28. There are a few small specks showing up in all of my photographs?
If you’re shooting with a mirrorless camera, this is just part of your everyday life. Small specs are usually caused by dust on the sensor. Little pieces of dust or scratches in the lens typically don’t result in any issues, but dust on the sensor will result in darker, or grey spots on the image.
They’re usually very easy to clean up. But sometimes, these specs can get in the way of important details, especially when it comes to macro photography.
The best way to get rid of dust is to buy a sensor cleaning kit. Make sure to get one from a reputable, trustworthy brand. If the sensor swabs are too rough, or poorly packed, they can permanently scratch your sensor. If you’re uncomfortable doing this job, take the camera to your nearest store for professional service with a warranty.
This is just one of the reasons why I’m still using a DSLR for landscape photography.
29. My photos look better when I take them on my phone
When I have friends starting out with photography, this is one of the main reasons why they put the camera down over time. When an image is taken on a DSLR, the images don’t always look as good or are harder to make look good. But the photos on your phone are just kind of magically great somehow.
The main reason that happens is because modern cameras are designed to allow the photographer the maximum amount of flexibility when they want to edit a photo. Especially high-end cameras will have a lot of dynamic range, which means the tones are fairly even throughout the image, instead of showing up with strong, uneditable contrast.
Cellphones are also masters of computational photography. They use algorithms, create HDRs, and edit images in front of you in a fraction the amount of time it would take a computer. This way, they’re able to overcome many of the drawbacks of having such a small sensor.
Read more about what your phone is doing in this article. And I also wrote another article on how to take better photos with your cellphone here.
How can I learn more about photography?
 Once you’ve mastered all of these issues, there’s still plenty more to learn about photography. Over the years I’ve taught over 600,000 photographers how to take award-winning photographs without ever having to upgrade their equipment. It all starts with my 4-step photography system that’ll teach you exactly how to find and take incredible photographs every time! It all starts with my free online web class, where you’ll learn about the system and come away with some of my eBooks that’ll help you get out of the manual with my camera settings cheat sheet and take better compositions.