
You don’t need lighting equipment that costs thousands of dollars for the perfect shot when nature provides the best lighting.
Some people are convinced that the middle of the day is the magic hour for photography, but the blazing afternoon sun brings with it unwanted shadows and bright, overwhelmingly harsh light.
On the other hand, if you catch the sun during sunrise and sundown, you get soft light that creates the popular moody, cinematic look. Wondering what are the best ways to take such epic shots?
Don’t worry; in this guide, you’ll learn how to take advantage of the golden hour light to click photos that take your breath away!
What Is Golden Hour Photography?
Before we get into the nitty-gritty of taking picture-perfect sun-kissed photographs, let’s start with the basics.
Sunrise and sunset are characterized by soft sun rays that blanket the landscape and bring a natural, warm glow. Needless to say, they are a sight to behold with the eyes and camera lens.
Professional photographers commonly dub these small windows of time the “golden hours,” because of the look and feel they create. It doesn’t come as a surprise then that shutterbugs often chase the sun, setting up early and awaiting the golden hour.
Indeed, it takes a certain amount of research to capture golden hour photos as sunrise and sunsets occur at different times in different places. Moreover, the exact duration varies depending on the season, weather, geography, and so on.
But, for the most part, the golden hour occurs about one hour after sunrise and one hour before sunset. These times change every day, so it is best to stay updated with local sunrise/sunset timings and plan accordingly.
Why Should You Wait For The Golden Hours?
For beginners and professionals alike, the golden hours are an ideal time for creating photographs. And there are perhaps billions of pictures to prove the magic of this tried-and-tested photography method.
Here are some reasons why golden hour lighting may be what you need on your next photography trip:
1. Diffused Light
Taking photographs during high noon could be a recipe for disaster, especially if you’re dealing with portraits. The direct sunlight is harshest during this time, leaving behind harsh, unflattering shadows on people.
For landscape photography, the midday shadows can be so harsh that your camera is unable to capture any details in the shadows. Distant forests appear completely black under the canopy, bodies of water reflect the harsh, white light back into the camera, and mountains just appear flat, textureless, and boring.
Similarly, the soft, golden-hour sun rays create a diffused light that lends a warm and natural glow to the skin in portraits and is easy on the eyes. So, your subject won’t be squinting when you put them facing the sunlight, all the while making use of the sepia-like glimmer.
2. Invokes Emotions
Golden hour photography gets its name from the characteristic soft tint that blends shades of yellow, amber, orange, red, and everything in between. No matter the subject in front of the lens, the sunset will behave like a warming filter that provides a sense of nostalgia and happiness.
You can even capture a prairie grassland, or lonely road in front of your house in the golden light and expect breathtaking photographs with a sentimental value. Read on for more inspiration on the best subjects to shoot during this magic hour.
3. Directional Lighting And Long Shadows
At any other time of the day, harsh sun rays touch everything in their way. On the other hand, the golden hour sunlight hits from one direction on the horizon, casting long shadows and soft, warm light.
Since the sun’s position is at a low angle, it provides ample opportunity for creating masterful illusions and textures using shadows and directional lighting. We will delve deeper into these golden hour photography techniques in the next section.

7 Golden Hour Photography Tips
1. Plan Ahead
Planning ahead is key to capturing a great image at sunrise or sunset. The light changes by the second. You can literally see the glow getting stronger and suddenly fading in front of your eyes. And when that light is coming there is no time to be setting up your tripod.
Sometimes, this means you will have to travel in the cold, damp, and dark early mornings while the rest of the world sleeps. While sunset photographs are as gorgeous as sunrise, evenings may not be the best time for landscape photography if you are shooting famous landmarks that become bustling tourist spots. However, if you’re out in the mountains, prairies, near the ocean, and places that take a little bit of work to get to, you’re probably going to be fine.
Anyhow, you should make use of apps, such as The Photographer’s Ephemeris, PhotoPills, or any weather app to keep track of the local sunrise and sunset times before setting the alarm. Moreover, be prepared with a clear idea of what and how you want to shoot because the light changes in a matter of minutes.
If you don’t plan your composition beforehand, the sun may disappear below the horizon or move overhead before you have time to decide on your subject.
2. Be Aware Of The Sun
The sun’s position plays a crucial role in any form of outdoor photography. Fortunately, the golden hour is any rookie and professional’s license to shoot from any side and still get good results.
Here are some ways you can position your shots:
A. Front-Lighting
If you want to apply front-lighting in landscape photography, simply shoot the subject with the sun behind you. This helps to bring out the colors in the scenery while taking advantage of the soft light.
Similarly, the subdued golden hour sun makes it easier for portrait subjects to face the light source. And apart from the illumination and brightness the sun provides, they will be lit with a warm, even, and flattering hue.
On the flip side, the high afternoon sun is often harsh and produces highly saturated images that wash out the subjects. If you are shooting a portrait, any sun-facing individual is bound to have an unflattering squint in an attempt to block out the sunlight.
B. Back-Lighting
Take advantage of the golden hour sun as a backlight by placing the subject of the photograph between the camera and the sun. Backlit images lend a dramatic flair to landscape photos by adding a deep contrast between shade and light. Many photographers use this technique to enhance the appearance and dreamy factor of fog and mist or to capture the long, inky shadows cast over landscapes.
However, bear in mind that perfecting your camera settings for back-lighting can be challenging, because your camera may expose the image for the bright lights behind the subject rather than the subject themselves. When the camera exposes for the highlights, your subject will become darker, or what’s known as a silhouette.
You can adjust the exposure using a reflector or a low-powered flash with a diffuser to make the lighting more even. Without a reflector or a flash, the highlights will become washed out and overexposed.
Moreover, back-lighting provides a magical and hazy glow perfect for artistic portraits. As the name suggests, the subject should pose with their back to the sun so that the rays diffuse all around them for a dreamy, cloud-like effect.
C. Side-Lighting
You can arrange your shot so that the sun’s rays radiate from either side of the subject, so one side is bathed in golden light while the other is blanketed by shadows. This adds depth and drama to any landscape, and you may end up with a nice glow at the edge of the frame.
Side-lighting is also a popular technique for taking portraits — especially if the natural light is too harsh for front-light-facing photographs.
However, taking side-lit photographs may be a bit tricky as you will be intentionally using the shadow to accentuate your photograph. In portraiture, this is known as Rembrandt Lighting, and if you get it wrong, it can be disastrous.
3. Golden Hour Camera Settings
The golden rule of shooting during golden hour is to shoot in RAW so that you can alter the white balance during post-processing. Alternatively, you can opt for the manual mode while avoiding the Auto White Balance (AWB) settings. The AWB balances the warm natural tones, which are desirable in this case, making the results appear bluer than in reality.
Most modern digital cameras can be set to “cloudy” or “shade” to capture authentic, golden hues. This tip will be particularly handy for beginners who are just starting out. No matter which white balance setting you use in-camera, they can be adjusted when editing the photos in Adobe Lightroom Classic and Photoshop if you shoot in a raw format.
Another aspect to look out for is the metering mode, which you can find in a digital camera’s viewfinder.
Here, you may pick between matrix metering, center-weighted metering, and spot metering. Ideally, you want to shoot with spot metering as it meters the light around the focal point and not the entire frame.
If your camera does consider the whole scene (like in matrix or center-weighted average metering) and not just on the focus point (like with spot metering), you may end up with a silhouette or a dark subject. However, silhouettes are fun to play around with and can produce dramatic and mysterious photographs with a little bit of creativity.
The easiest way to adjust your camera settings during the sunset or sunrise is to use Aperture Priority mode. This mode allows the photographer to choose the aperture that best fits their situation, while automatically changing the shutter speed to adapt to the sun getting brighter or darker.
Choose an aperture value that works for your situation. If you want a greater depth of field (the amount of the image that is in focus), you will need a smaller aperture (or higher f/stop number) such as f/8 or f/16. If you want the foreground or background to be blurry, then you will need to use a wider aperture, (smaller f/stop) such as f/2.8 or wider.
Most landscape photographers use small apertures to get everything sharp and in focus. Usually, the smallest aperture they will use is f/16 because smaller apertures than that will cause the image to be less sharp overall.
The last setting to adjust is the ISO. ISO controls how sensitive your camera is to light. Higher ISO settings mean that you can use a faster shutter speed with a smaller aperture, but it will add noise to your images.
If you are shooting landscape photographs on a tripod, then you will want to use a low ISO to create the sharpest, noise-free image possible. For portraits, or when shooting landscape photos without a tripod, you will need to increase your ISO so that you can have a shutter speed that is fast enough to freeze the motion in your hands.
Use HDR to capture all of the dramatic light
Have you ever taken a photo during the golden hour, and come home to find the sky was too bright and you can’t get those vivid colors that you saw with your eyes?
That happens because the camera you are using doesn’t have enough dynamic range to capture all of the light in the scene. Even the best cameras still can’t yet compete with the human eye in terms of dynamic range.
That is, unless we use software to make a high dynamic range, or HDR image. HDR photography is just taking three photos at different exposures using bracketing, and then combining them into one using Lightroom Classic or Photoshop.
I use Lightroom Classic for the majority of my HDR images, because it’s so easy to use. Take a look at this article to learn how to use HDR Photography to make stunning golden hour photographs everytime.
4. Working With Shadows
Shadows can bring depth and character to a photograph, but they can also cause a phenomenon called “raccoon eyes.” Indeed, the eyebrows may cast a shadow under the eyes when shooting with the sun overhead.
Fortunately, such flaws are rarer in golden hour portrait photography, where the sun’s rays are soft and angled. Here, the light usually comes in from the sides, which you can use to your advantage. For instance, you may shoot a portrait in which one side of the subject’s face is darker for a dramatic effect, also known as Rembrandt lighting.
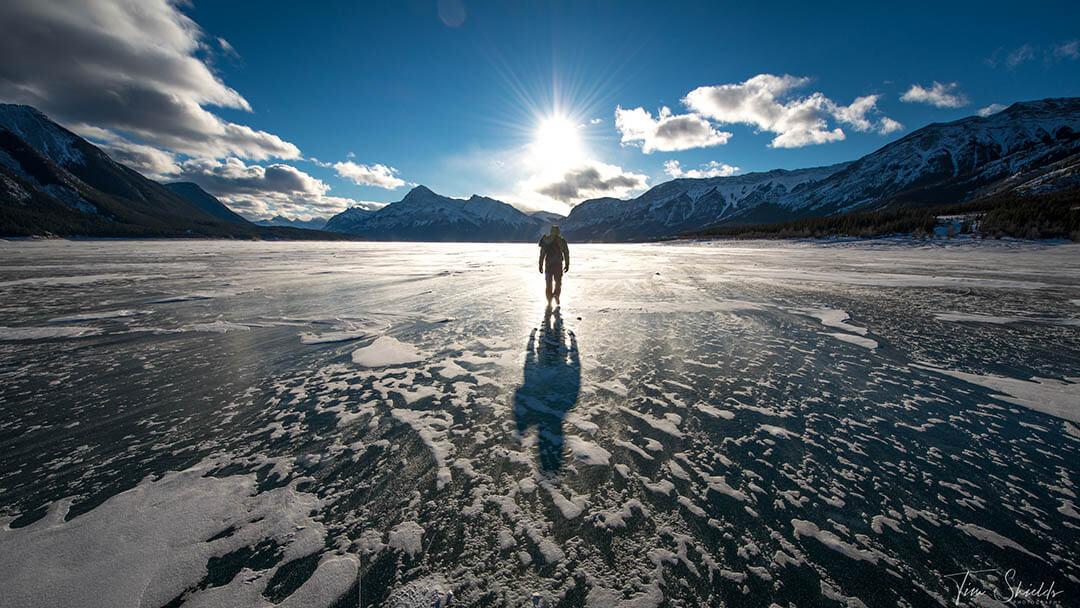
Or perhaps, you can feature long shadows in golden hour photography — whether they are the subject’s or your own. The sun’s position during the golden hour is at a low angle, thus creating long shadows that add texture and a compositional element.
You can also use these deep shadows to balance the warm colors of the photograph, emphasize different textures.
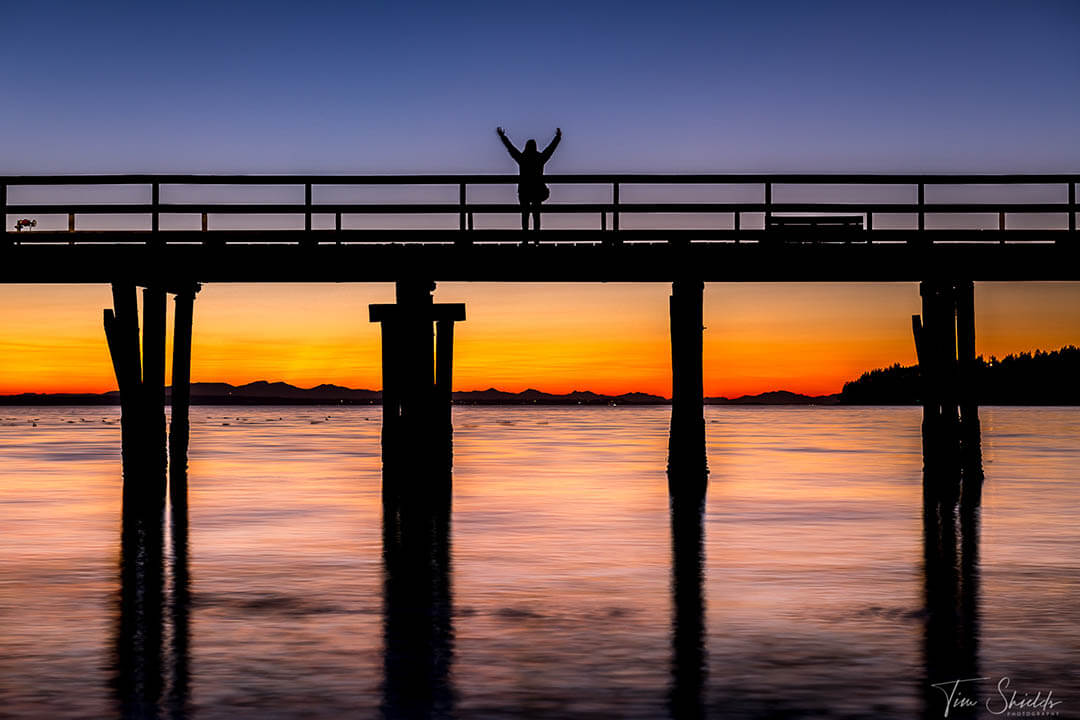
5. Creating A Silhouette
To create a silhouette, the subject should ideally be in front of the bright light emanating from the sun. Here, the subject is blacked-out, and the focal point is the bright, golden sky in the background. By doing so, you will be able to create an aura of mystery and drama.
This method is excellent for subjects with an easily recognizable shape, such as wildlife, mountains, and architecture.
You can also create a silhouette with bright rim lighting. Here, the background must be darker, and your subject must be outlined by a faint glow from the sun’s rays. For instance, the edges of a leaf or a model’s hair gently lit by the sun’s rays create an exciting element that turns the subject into the focal point.
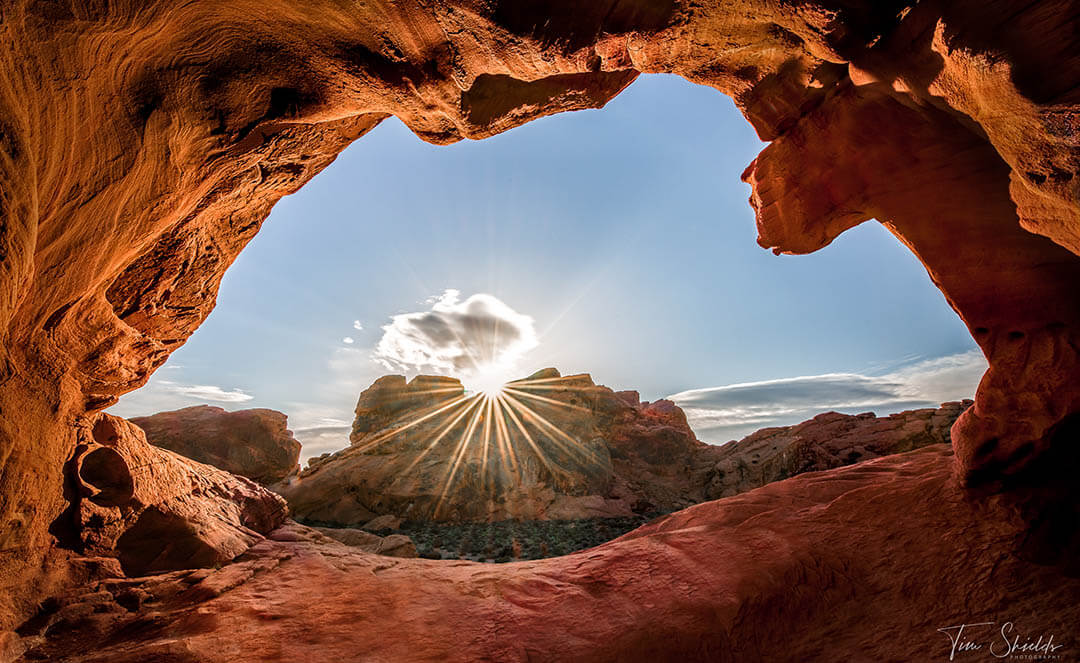
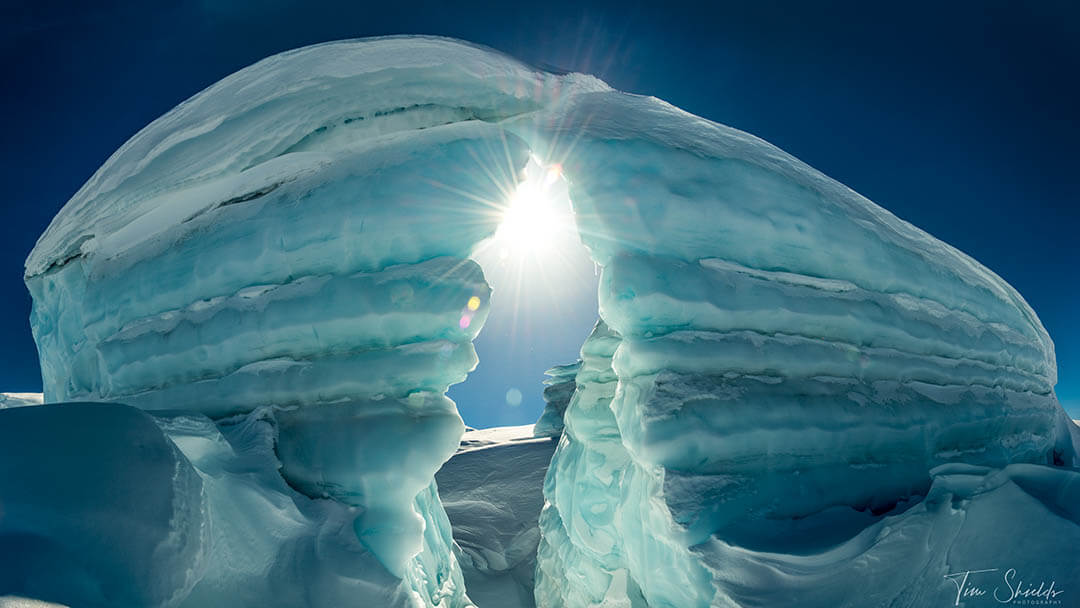
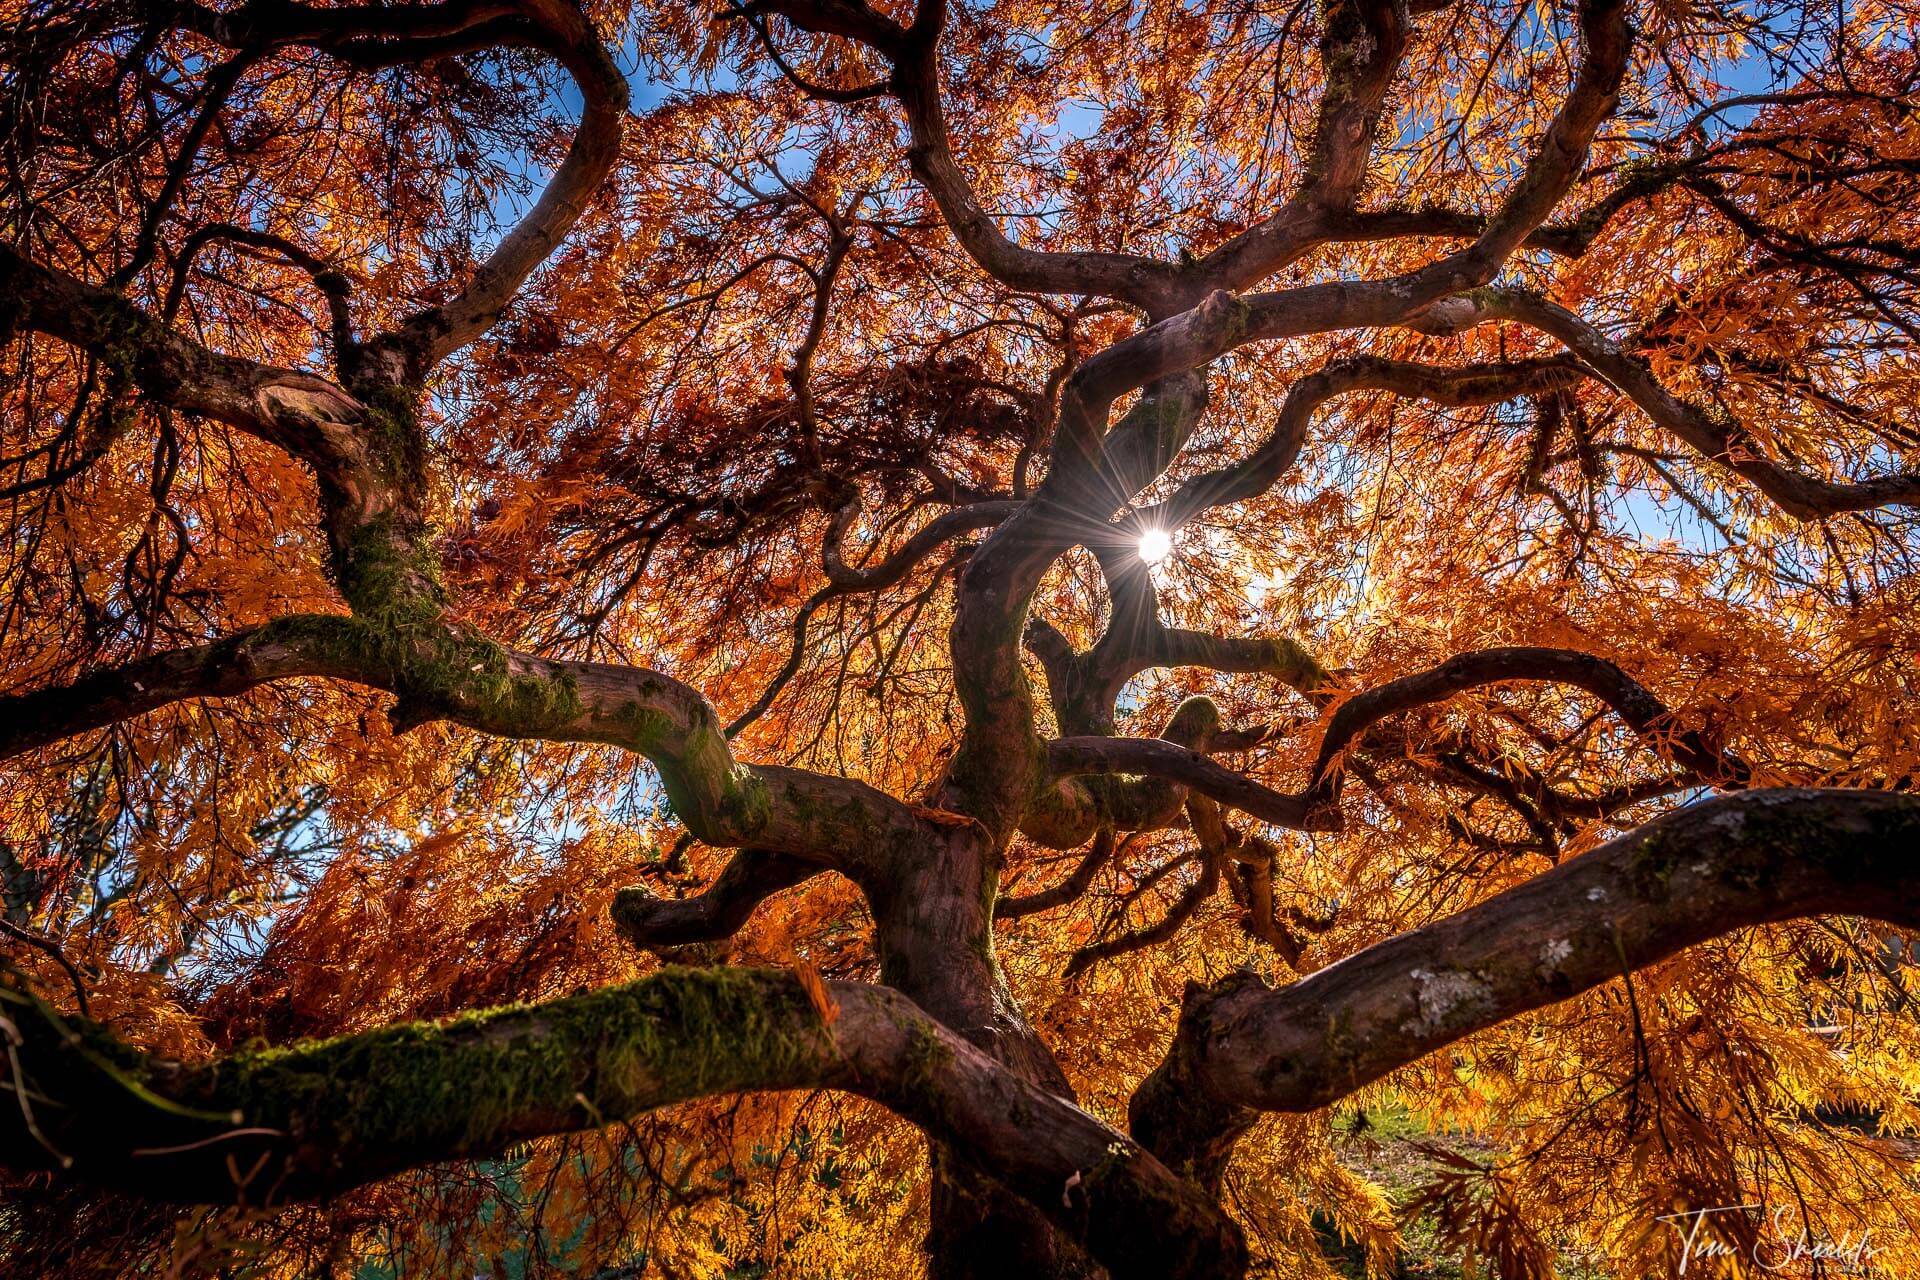
6. Sun Flares
The bright flare of light captured when sunlight hits the lens may be seen as a flaw or a thing of beauty depending on the photographer’s artistic opinion. That said, flares and starbursts add an exciting element to a photograph — but most important, they are fun to work with.
To create this optical effect, set the aperture to a high value (usually around f/16) and underexpose the image to ensure that the flare is not overwhelming. Then, point in the direction of the sun and press the shutter release just as the subject blocks a part of the light.
Partially obscured flares also add drama to any photograph. The best way to capture an exciting flare is by repositioning yourself at different angles to see what works.
7. Keep Clicking Beyond The Golden Hours
Missed the golden hour? Don’t worry — it occurs twice a day!
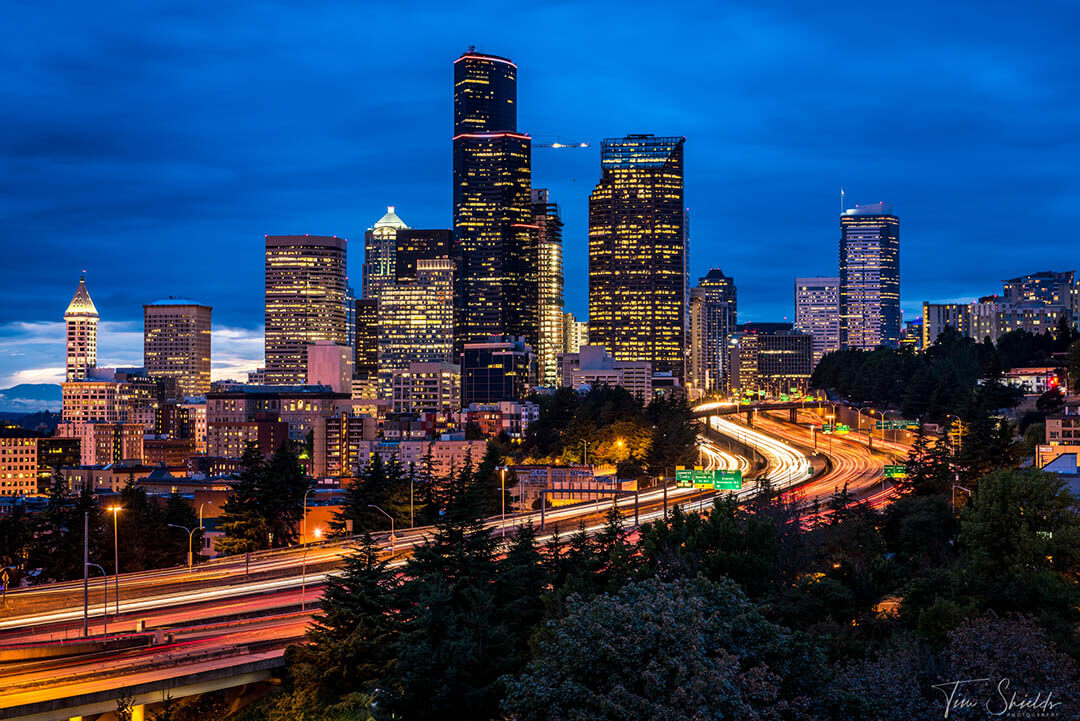
And even if you missed the sunrise and the sunset, the magic continues. The golden hour is followed by the “blue hour” once the sun sets in the evening.
So, if you wait around long enough, you may be able to capture the cool notes of blue light that bathe the surroundings before nightfall. On that note, some enjoy putting together two photographs of the same location under the two different shades of light.
Blue Hour is often loved by street photographers because there is still enough light illuminating the sky to make evenly exposed compositions. As well, the blue light contrasts perfectly with the yellow street lights to create a dramatic looking image.
Best Types Of Photographs To Shoot Under The Golden Hour Light
1. Use the sun in your composition
Although a no-brainer, sunrises, and sunsets remain classic subjects. Use f/16 to make a solar flare, or plan your photograph so that the sun reveals itself in the perfect position, like underneath the Mesa Arch. At the same time, chasing the sunrise allows you to take a breather from your life and bask in the calm and serene beauty of nature as the world sleeps.
2. Portraits
The golden hour is perhaps the best part of the day to take portraits as it allows your subject to pose anywhere they want. So, whether you prefer to use front-lighting, back-lighting, or side-lighting, you can almost always expect a flattering and warm tint to complement the model’s features.
3. Wildlife
Creating silhouettes of animals against a beaming sun remains one of the most popular ways to highlight their easily recognizable features. Or perhaps, you may want to enhance the warm and golden tones of a majestic lion or the ochre skin of a giraffe under the golden hour light.
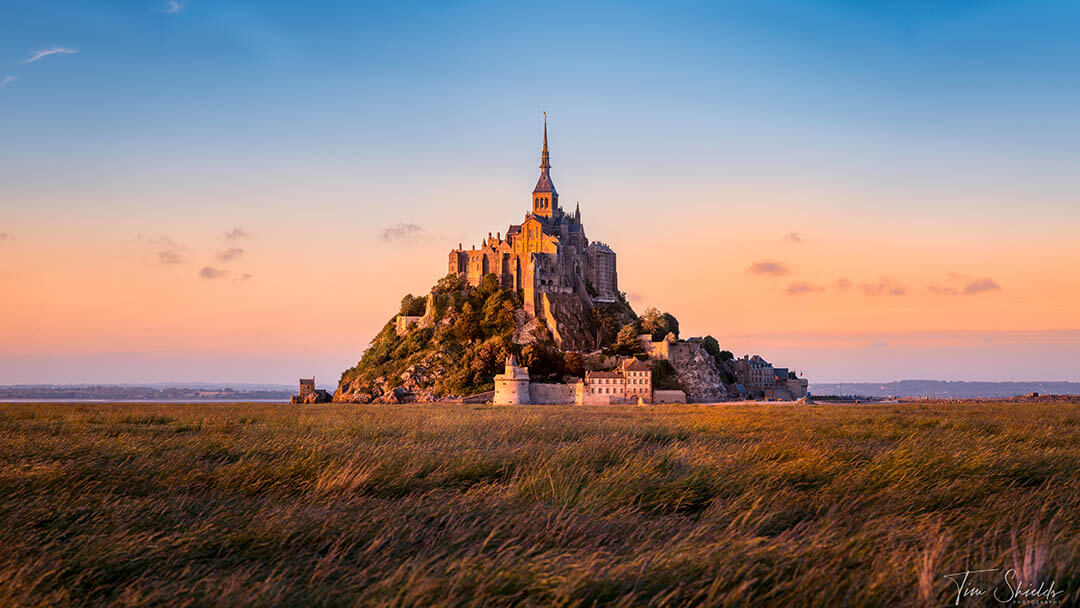
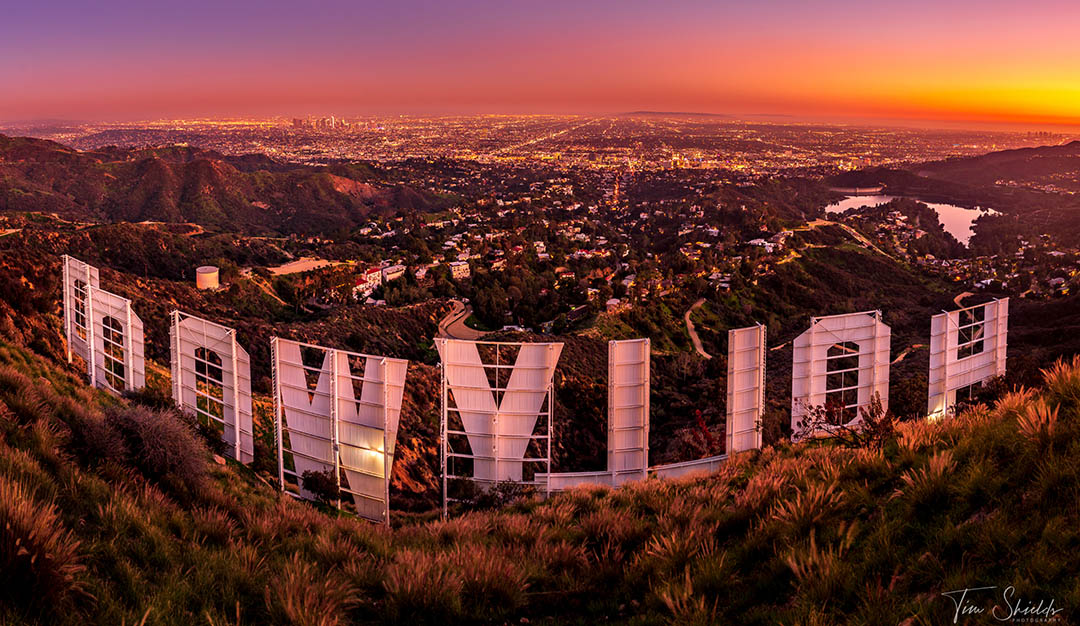
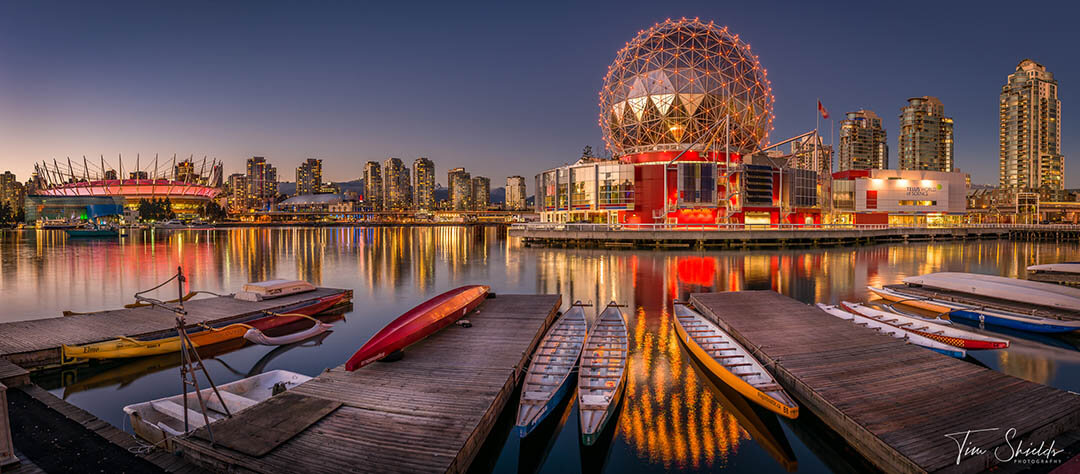
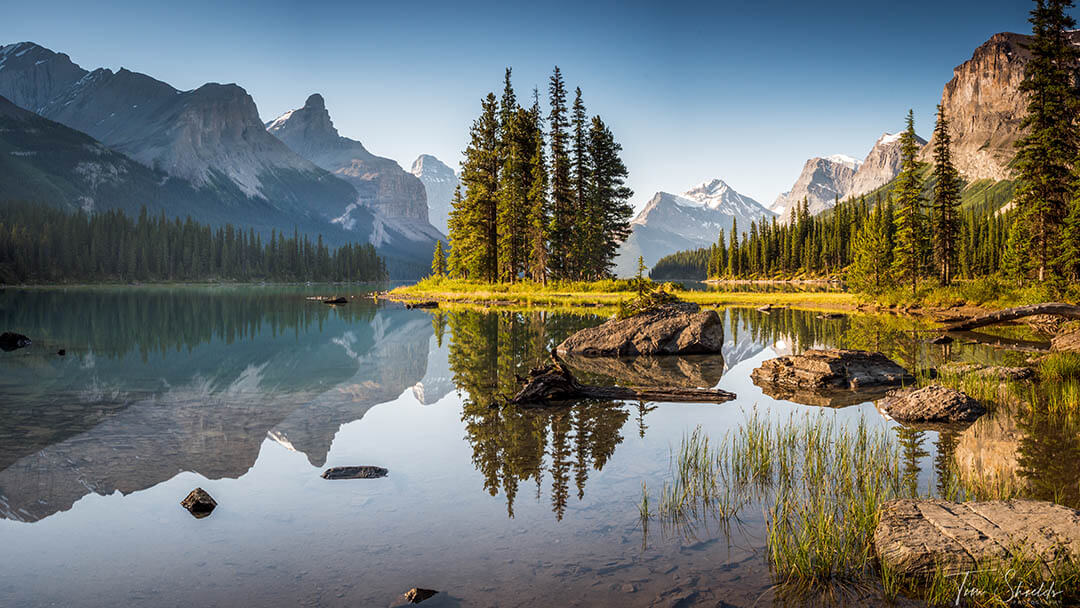
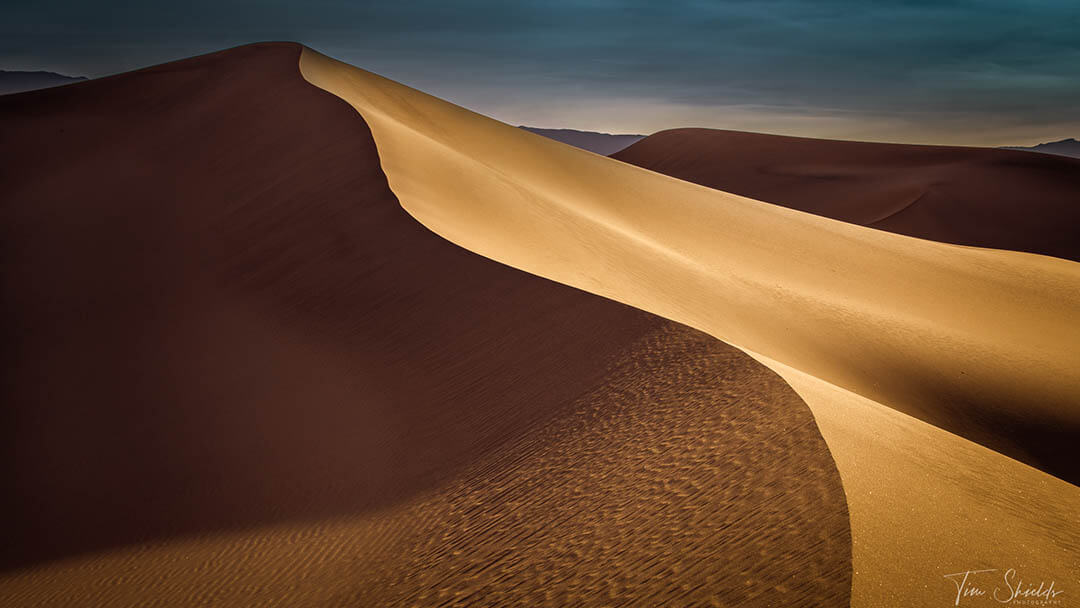
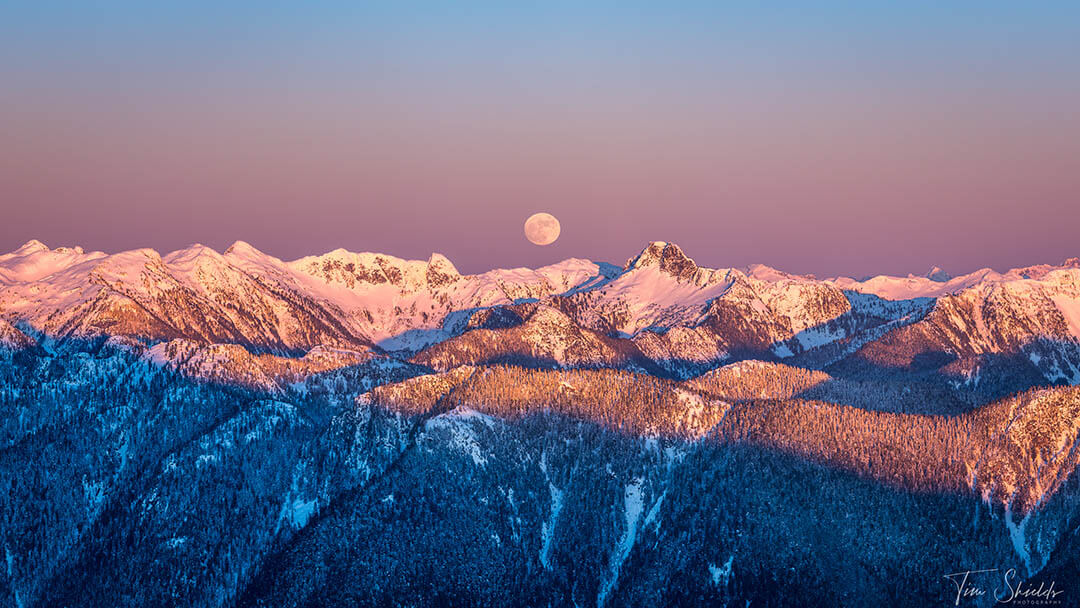
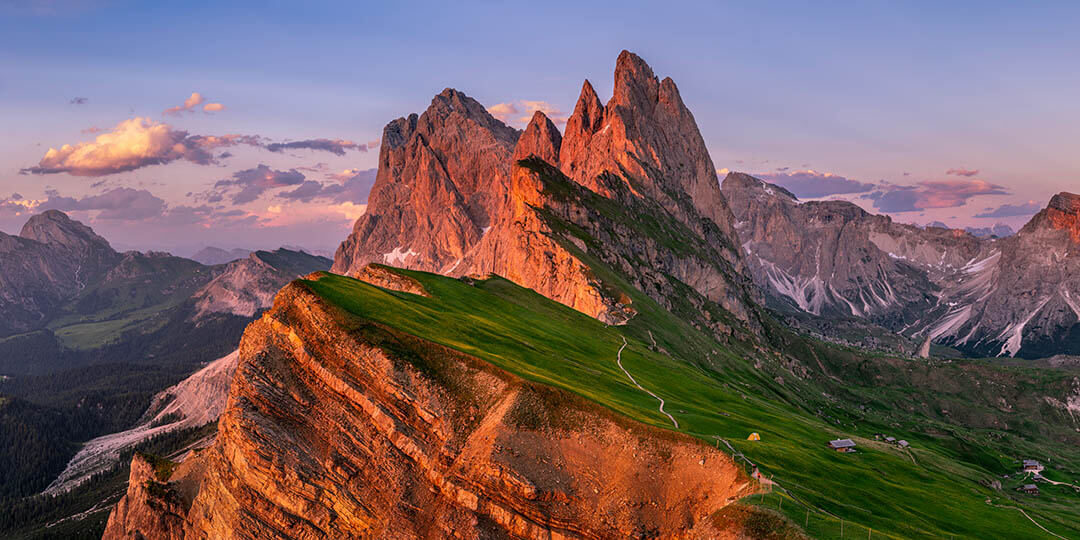
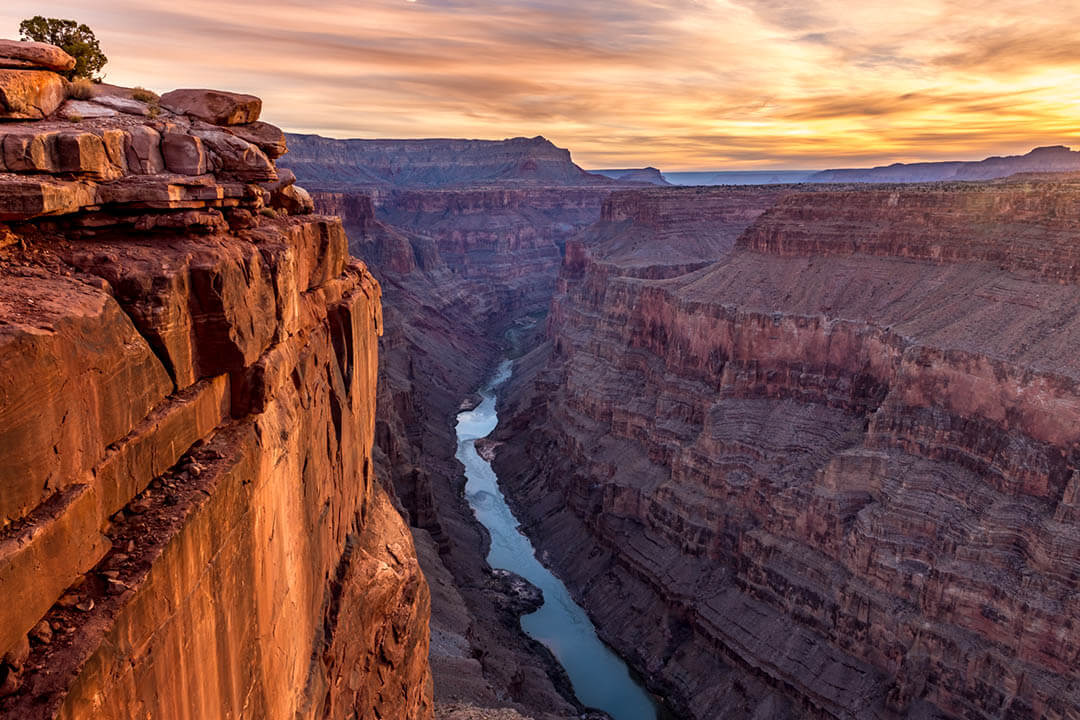
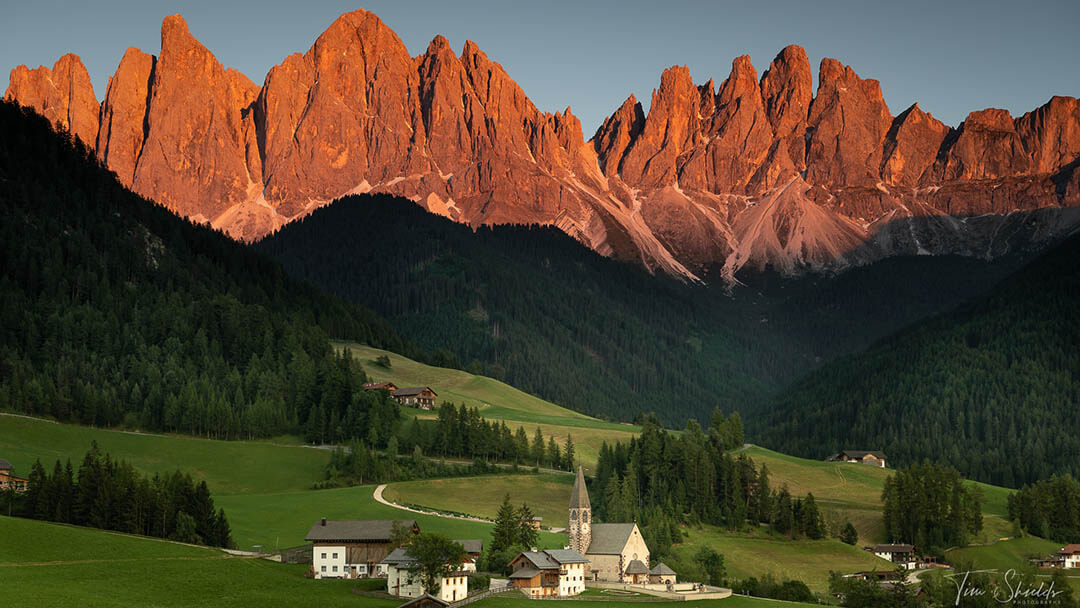
4. Landscapes
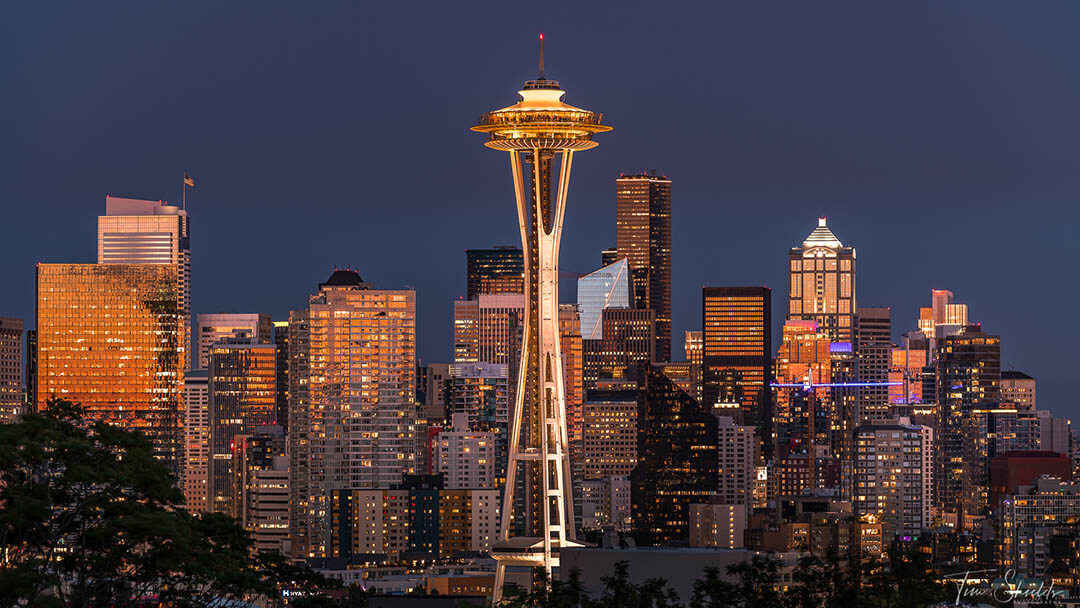
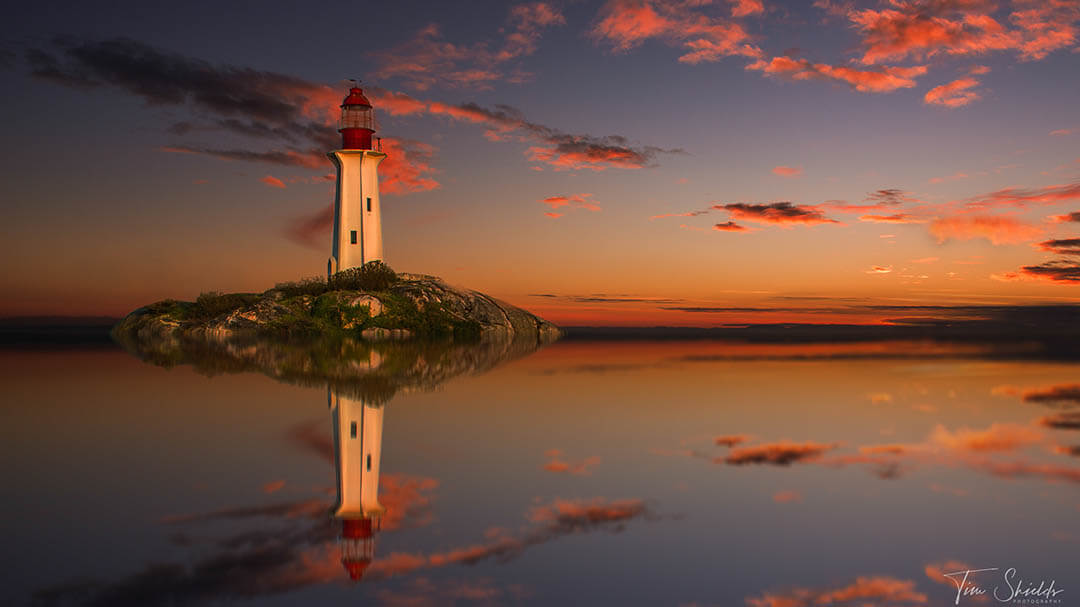
Whether your choice of subject is natural landscapes, urban landscapes, or even seascapes — you cannot go wrong with golden hour photography. As an added tip, you can convey motion through long exposure. The subdued golden hour light can create mesmerizing reflections to add to the ethereality of the scene.
On the other hand, the rusty-red iron dunes in a desert during the golden hour can be any photographer’s dream.
5. Everyday Life
There is beauty in the ordinary, and the golden hour can help bring out the magic in everyday life. You can shoot a lonely tree, broken fences, old construction sites, or empty roads, and the warm tint of the golden hour will add a hint of sentimentality.
Final thoughts
Golden hour lighting does justice to your portrait subjects, bathing them in glittering gold. At the same time, the magic hour provides a golden and regal touch to architecture and landscapes. In fact, it can make even everyday scenes look like a frame out of an artistic movie.
While golden hour photography may seem like the most effortless way to shoot awe-inspiring photographs, it’s far from a magic solution. So, don’t expect to turn every bad photo into a good one just by going out at sunrise or sunset.
You need a dash of creativity, plenty of practice, the correct camera settings, and the latest updates about the golden hours in your area to capture incredible results. So, go ahead and get your camera ready before golden hour starts!