
https://www.youtube.com/watch?v=kGMB9RunDAk
Video: Aerial Photography – How to get great aerial photos.
Have you ever needed to take photos from the air, and a drone shot just won’t do? If you are a photographer then sooner or later you are going to need to photograph something from the air. If you are in need of aerial photos then you have three choices:
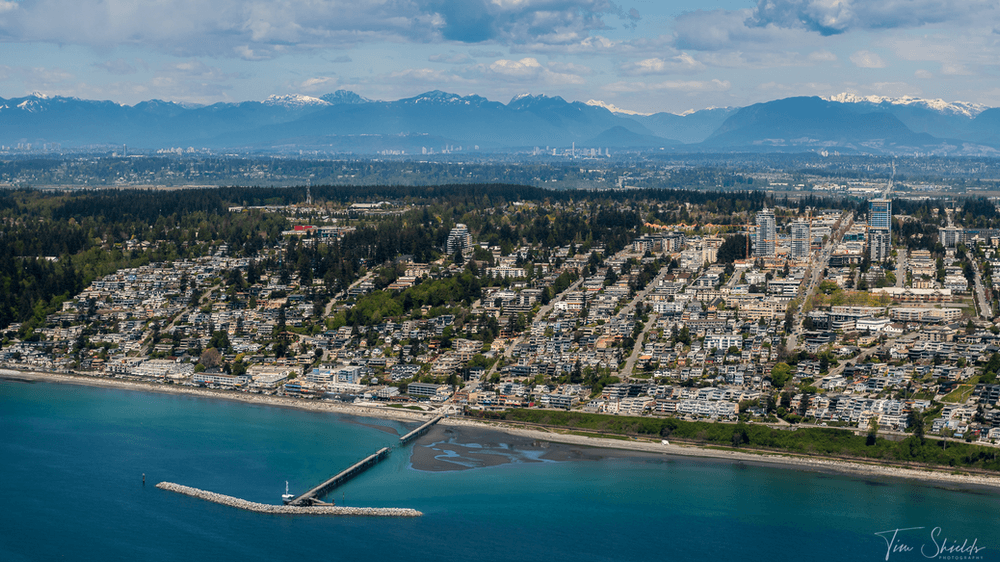
Aerial view of the City of White Rock – May 2019 – 47MP image
1. Drone. Everyone’s first thought when aerial photography is needed is to use a drone, but drone use has certain limitations. The first limitation is that the image size of a drone photo is quite small when compared with the image size from a full frame camera. A full frame Nikon D850 has an image size of 47 megapixels whereas a drone has less than one-quarter of that. The other limitation with a drone is the lack of dynamic range. Drone photos almost always involve taking pictures of parts of the sky and this creates a big problem when there is not a high amount of dynamic range available especially when compared to a full frame DSLR camera. And finally there are so many restrictions on the use of drones that photographers often find they don’t have permission to fly the drone at the location where they need the aerial photos. This may not seem like a big problem but if the photos are going to be made public or will be sold to a client then the proper approvals need to be in place.
2. Helicopter. A helicopter is that go-to solution for most photographers when they need aerial photos. The one downside of helicopter use for photography is the cost. Helicopters can easily cost $1000 for a 30 minute flight. Helicopters are clearly very convenient for aerial photography but the downside of the high cost often prohibits their use. Having said that, helicopters in my view are clearly the way to go for aerial photos.
3. Airplane. This is the option that I chose when I needed aerial photos of the pier located near my home. I needed the highest possible resolution photos, so a drone was out of the question. I didn’t want to spend a lot of money for the photoshoot so that ruled out a helicopter. A friend of mine owns a small plane and I was able to go up in the plane with him to get the aerial photos that I needed. Even though an airplane is less expensive than a helicopter, it brings with it some serious drawbacks for aerial photography. The biggest drawback is the presence of the airplane’s wing. No matter which direction I wanted to photograph in, it always seemed like the wing was in the way of the shot. The plane also did not have opening windows except for one very small opening in the window beside the pilot. This meant I wasn’t able to take photos on the passenger side of the plane unless I was shooting through the plexiglas window. Although some of my photos taken this way worked out very well, many of them had nasty reflections that rendered the photos unusable.
One of the most important aspects of aerial photography is choosing the right shutter speed. You have to remember that you are moving at a speed of more than 100 miles per hour when you’re in a small plane. I have a general rule of thumb or in scenarios were I as the photographer is moving. I will use a shutter speed of 1/500th of a second. So for this daylight flight I used a 1/500th of a second shutter speed which worked out well for most of the photos. Having said that, there were some photos that were not tack sharp and I should have used the faster shutter speed – probably 1/1000 second.
When you’re standing on the ground it is easy to forget that small planes can be quite bumpy when they are up in the air. There were segments of our flight when the plane was bumping around constantly and it was very difficult to take photographs through the tiny window at that time. A 1/500th of a second shutter speed was definitely not fast enough when the camera was bouncing around through the small opening in the pilot’s window.
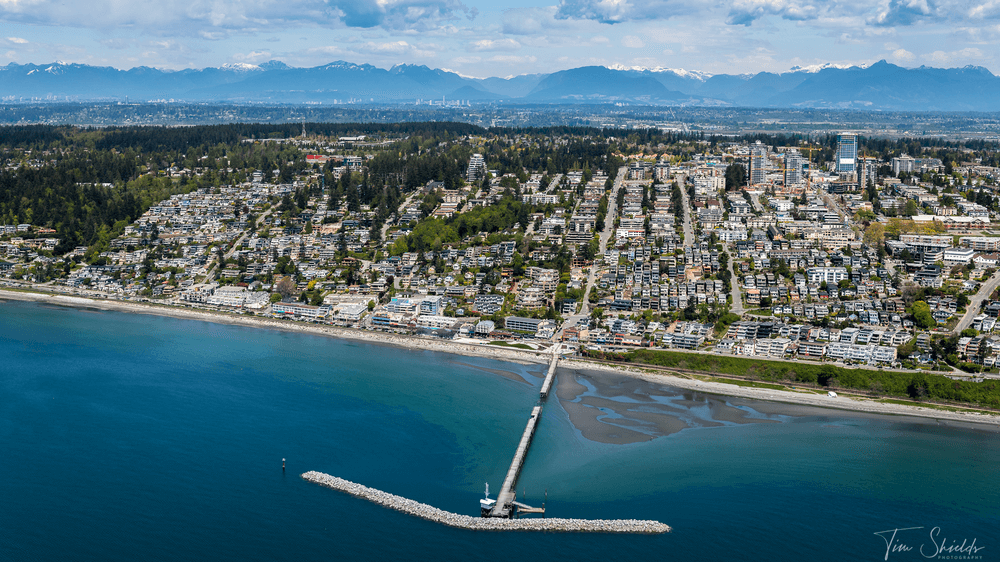
High resolution 47MP image of the White Rock Pier after the storm
The correct camera lens to use for aerial photography is dependent upon the altitude of the plane. On my recent flight, we were photographing the pier at an altitude of 1000 feet. I found that a 24-70mm lens was perfect for this altitude because I wanted to photograph a somewhat wide view of the city. There were times I was zoomed in to the full 70mm and other times I was at about 35mm. I brought a 70-200mm lens with me on the flight, but there was never time to change the lens. If I was using the 70-200mm lens, a 1/1000 of a second shutter speed would have been essential. You need to remember that the faster you are moving, the faster your shutter speed needs to be. As a general rule, you can double the focal length of your lens and convert that into shutter speed. This would be the minimum shutter speed you should use with stationary objects and with handheld camera when you are not in motion. So if you are shooting at 70mm you can get away with a shutter speed of 1/140th of a second. However, if you or your subject is moving then this number should be doubled or even double a second time. I would not even think of shooting from a moving vehicle or plane with my lens set at 200 mm without using a 1/1000th of a second shutter speed.
Another important thing to consider when taking photos from the air is your cameras histogram. I always check the histogram with my photos to ensure that I am not blowing out the highlights. I am always reminding myself that blown out highlights cannot be recovered in post processing. My ideal histogram for a shot that has the sky in it is to have the right side of the histogram just barely touching the right hand side of the box. This ensures that the highlights are not blown out.
I processed my photos from this aerial photo shoot using Lightroom and using my own presets collection. You can get a free sample pack of my presets for Lightroom here at this link. https://www.timsphotos.com/freepresets
